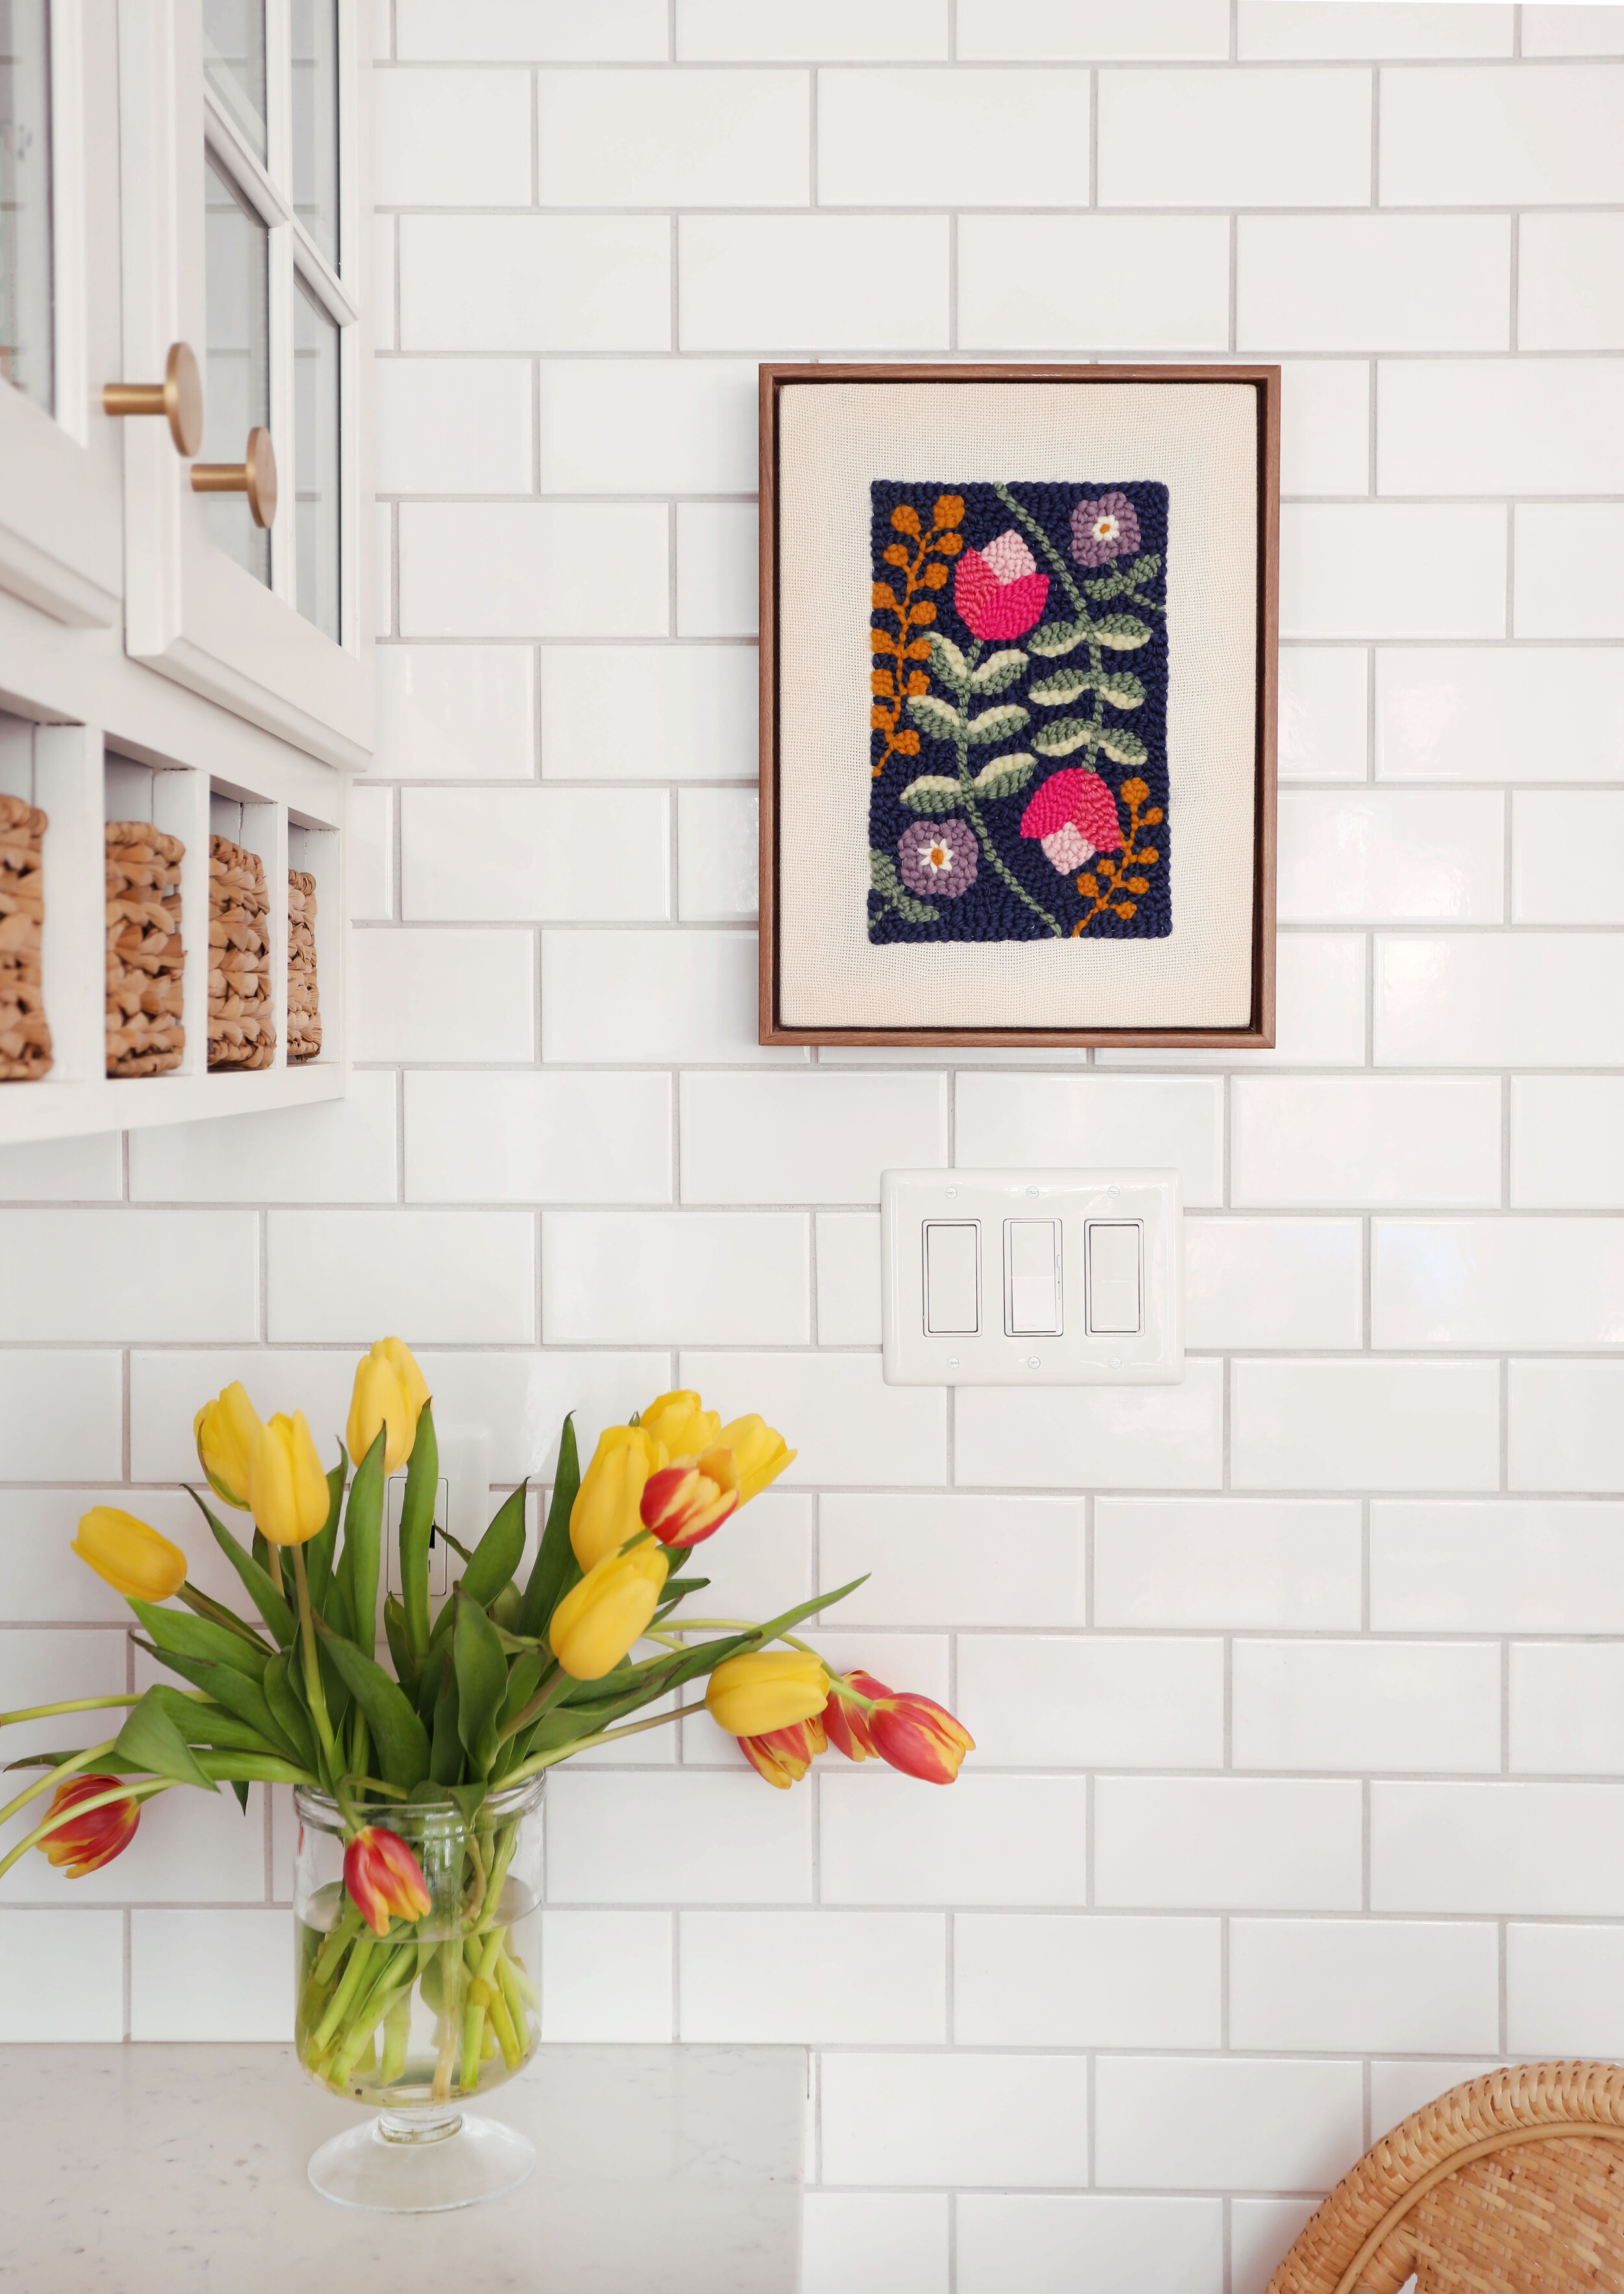
DIY punch needle : Scandi Floral wall hanging
/Try your hand at this super easy + fun craft and get a beautiful fiber art wall hanging in the process!
So today let’s chat about one of my favorite crafts: punch needle! If you aren’t familiar – punch needle is a simple embroidery technique that involves punching loops of yarn through tiny holes in a woven cloth with a hollow tool to create a design. Once you get the basic process down, you can make really cool projects such as wall hangings, pillows, or even rugs, and the best part - it’s very beginner-friendly and everything comes together quickly!
I started experimenting with punch needle about a year or two ago and I was hooked from the beginning! It’s easy and very satisfying to do. Today, I’m going to walk you through how to get started and the materials you will need to create this Scandinavian-inspired floral wall hanging.

Materials
To get started, you will need the following items:
frame wrapped Monk’s cloth
punch needle tool
yarn:
hot pink / navy / golden yellow / mint green / sage green / cream / petal pink / lavender / light pink
a good pair of scissors
painter’s tape
the pattern (download here)
pencil / disappearing ink pen
floating frame
Step 1 – Transfer the pattern onto the fabric
Once you have your materials and are ready to go, you will first need to transfer the pattern onto the fabric. Center your pattern on top of your fabric. Mark the corners using a disappearing ink pen or a pencil, making sure to push the pen through to see the mark on the backside. Connect the corners with a ruler. Next, flip the frame to the back again and tape down the pattern, making sure to align it with the corners. Head to a window (or you can use a light box if you have one – I didn’t) and trace the pattern onto the fabric.

Step 2 – Thread your needle + start punching!
To thread your punch needle: take your yarn end and slide it through the hole at the tip, facing away from the slot. Pull the yarn through the slot and leave about a 1/2’’ tail sticking out of the hole.
For the first stitch, hold the punch needle the way you hold a pencil and punch all the way down to the wooden handle. Pull the yarn from the end of the open slot through to the back, leaving a 1/2” tail. Pull the tool back up and start punching the yarn all the way down (to the wooden handle) and back up, following the lines of the pattern. Make sure when you pull up your tool, you are keeping it close to the surface of the fabric.
I like to outline the shape first and then go back and fill the rest in. Punch about every other hole and alternate your stitches from one row to the next (like laying brick) and make sure to keep the open slot of the needle facing the same direction you are punching. A good rule of thumb is to punch about 6 stitches per inch for the outline and 4 for filling in. See the video below for a (very quick) demo.

Step 3 – Switching colors + finishing punching
Once you have completed a section and are ready to switch colors, gently push your needle all the way down, snip the loop to create a 1/4” tail on the back. Be careful to cut the yarn all the way through and gently pull your needle out, avoiding pulling on your stitches. Repeat as needed until all sections are complete. Trim the excess ends to the length of your loops.
Once your piece is finished, drop it into the floating frame and hang that baby up!

For fun, I experimented in iMovie and made this little video summarizing the whole process.

A few things to note:
Punch needle is very forgiving. If you make a mistake, loosen the stitch on the flat side and gently pull it up to remove. If you end up pulling out several rows or sections, the fabric will get a bit stretched and holes will appear. You can run your finger or the tip of your needle against the fabric, pushing the lines back to shrink the holes.
Do not punch every hole. The fabric will become too taut and your stitches will end up being overcrowded.
Your finished piece will expand about 1/4’’- 3/8’’, compared to the original design (the chunkier the yarn, the more it will expand)
I hope you enjoyed getting to know a bit more about punch needle! I am by no means an expert, but I really do enjoy this technique and feel like it’s attainable to all crafting levels! In case you need a re-cap of the materials to make this, I’ve got you covered below!
