Home tour: the serene and happy home of Monika Martin from Zigzag Studio Design

zigzag-3.jpg

I’m so very excited to share this special home with you guys today. It belongs to my very sweet friend Monika, who I actually met on Instagram! Monika is the designer, artist and maker behind ZigZag Studio Design. In addition to her mega talent and style, she is one of the kindest and most positive souls I have ever met. I mean, if you look up kind in the dictionary, I’m convinced her picture will be next to the definition!

zigzag-2.jpg

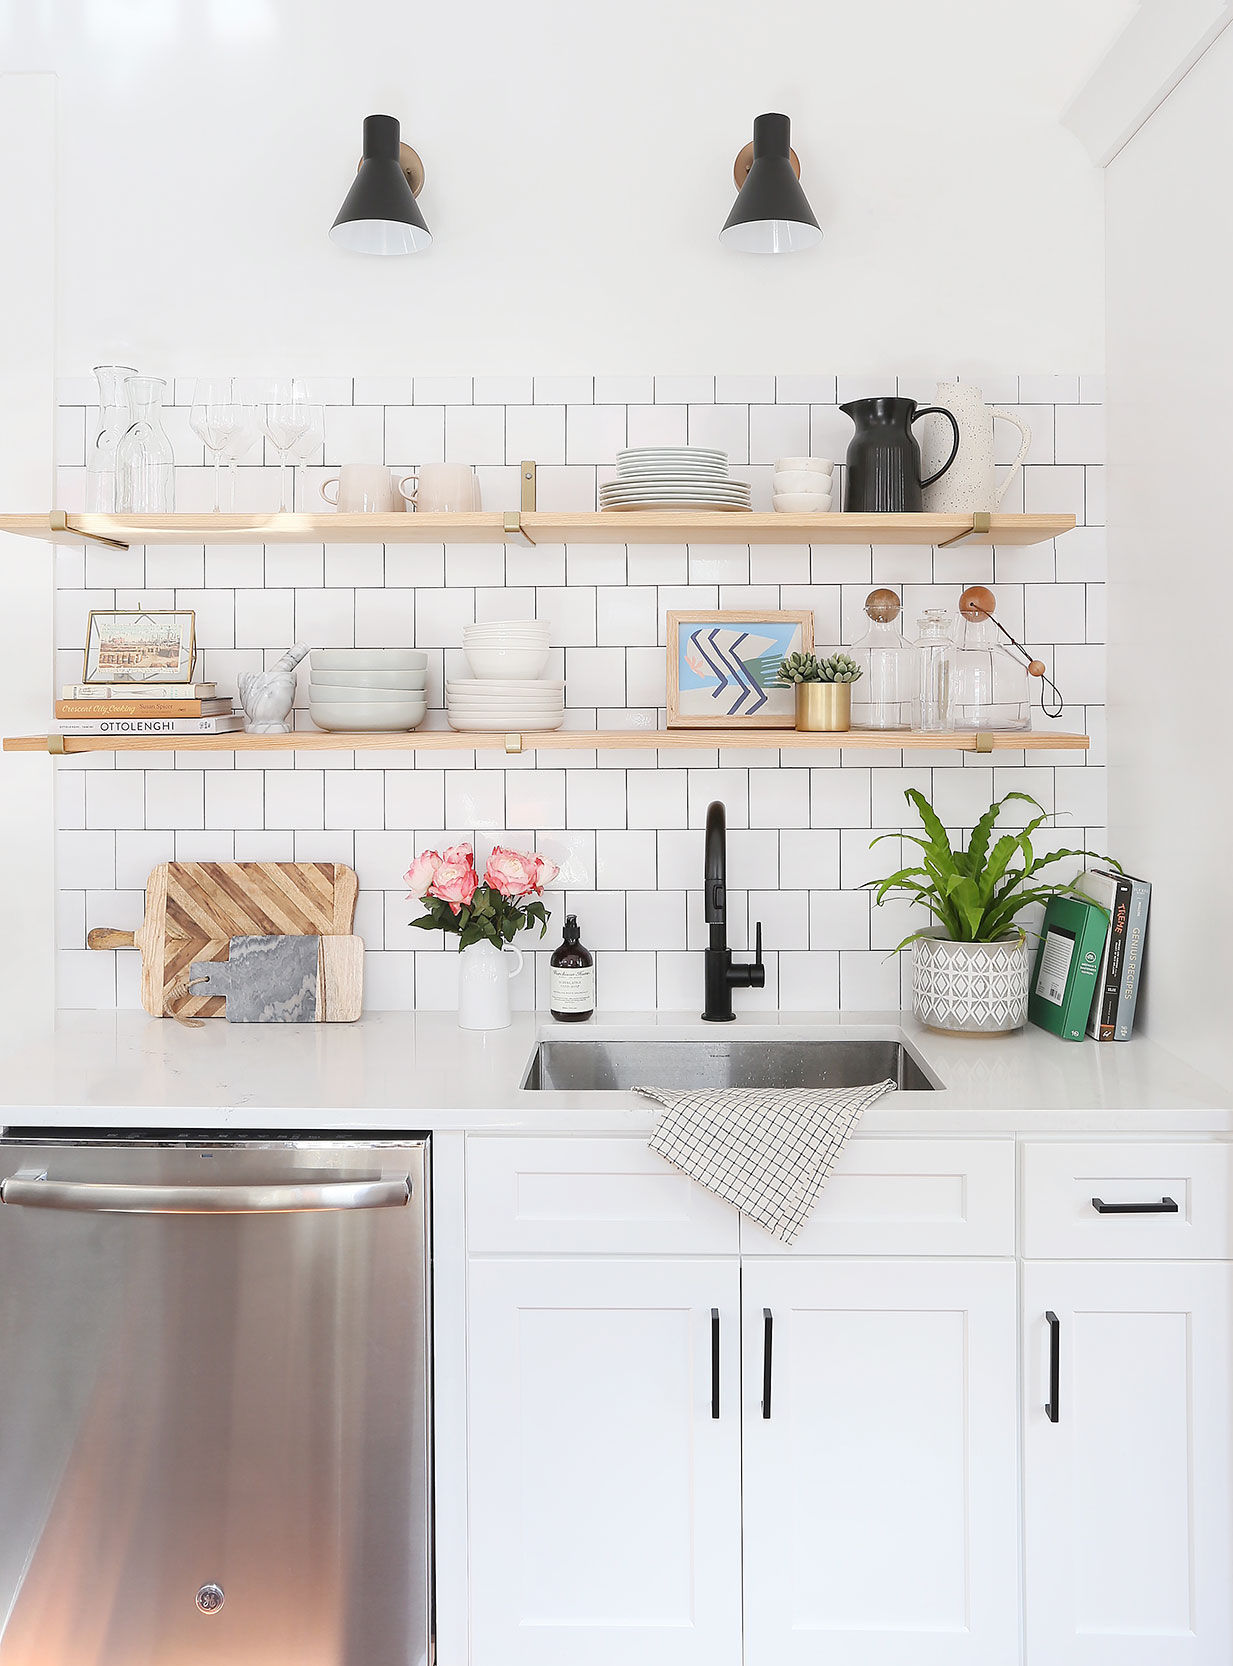
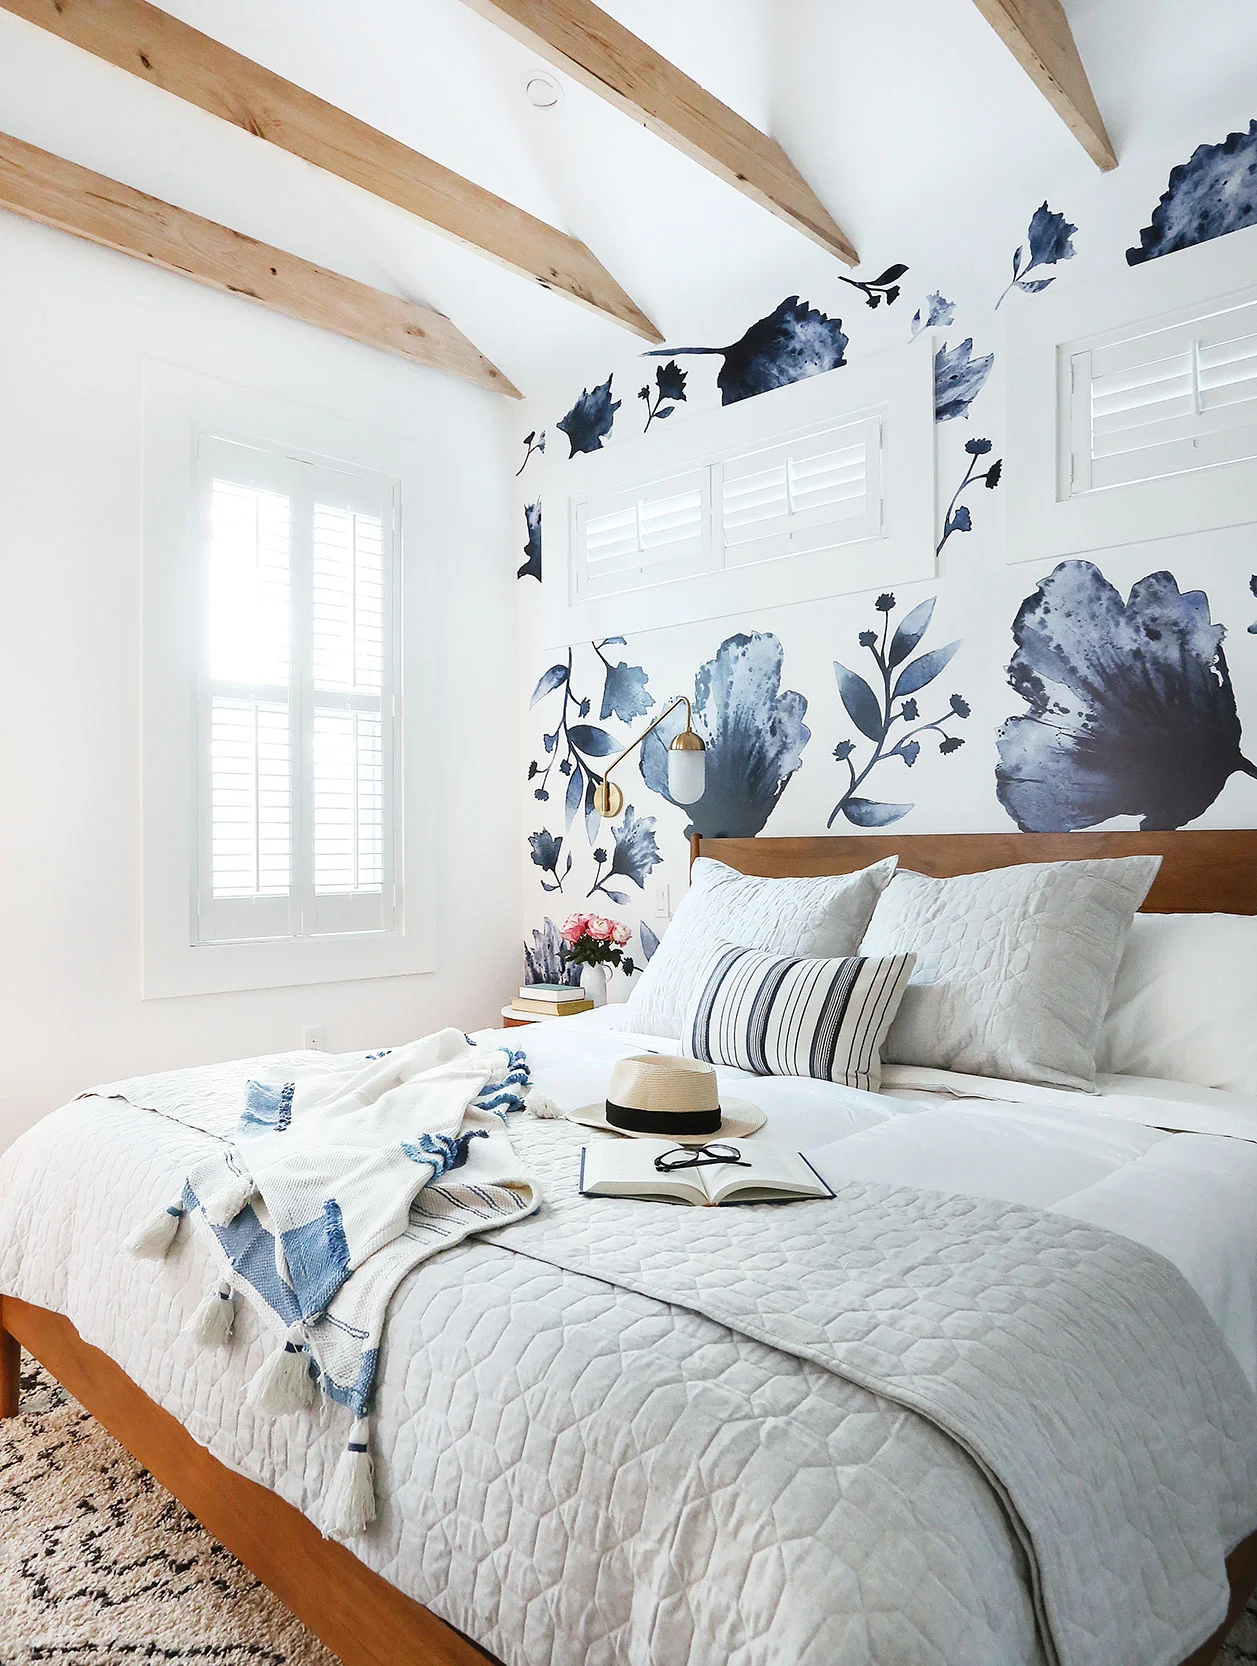
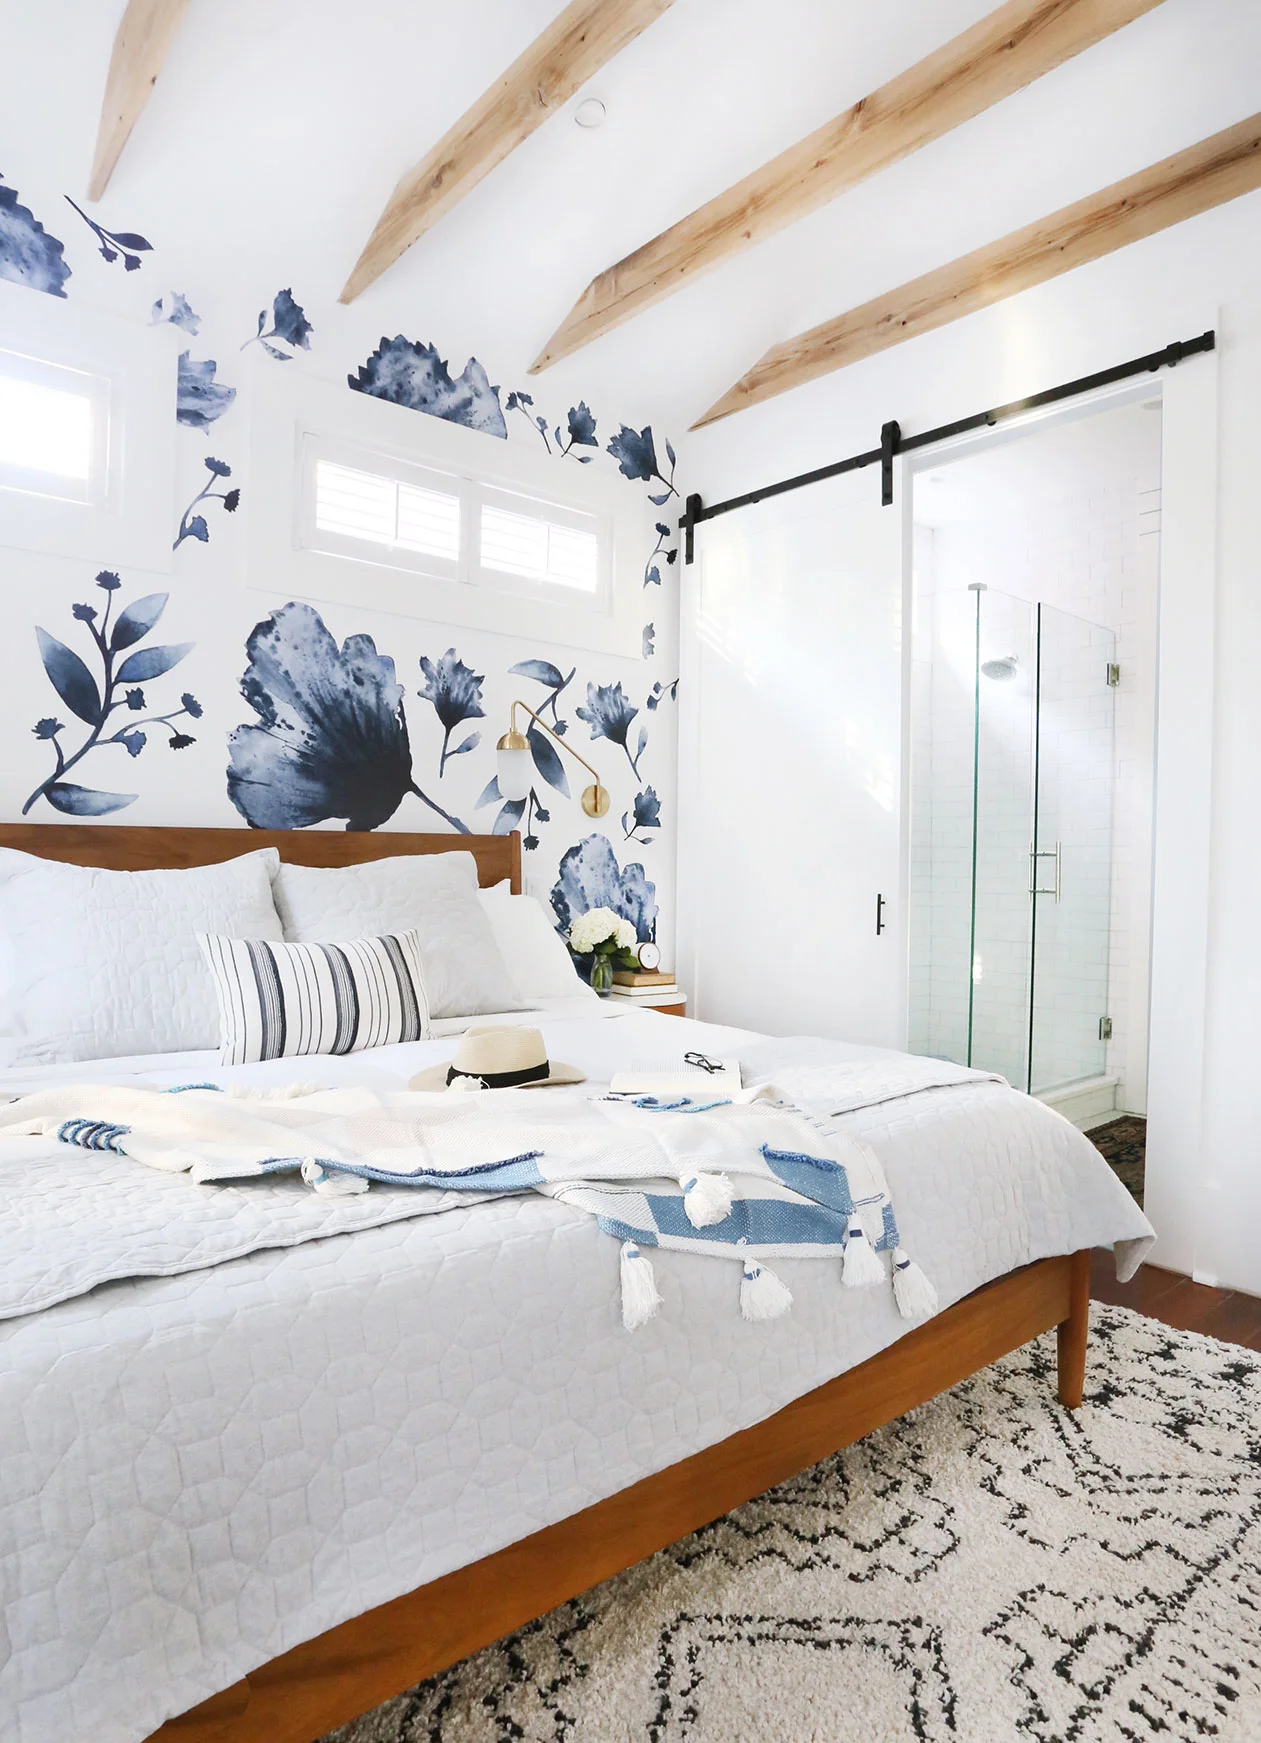
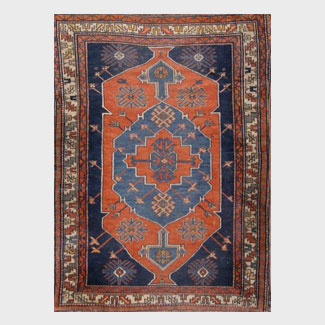
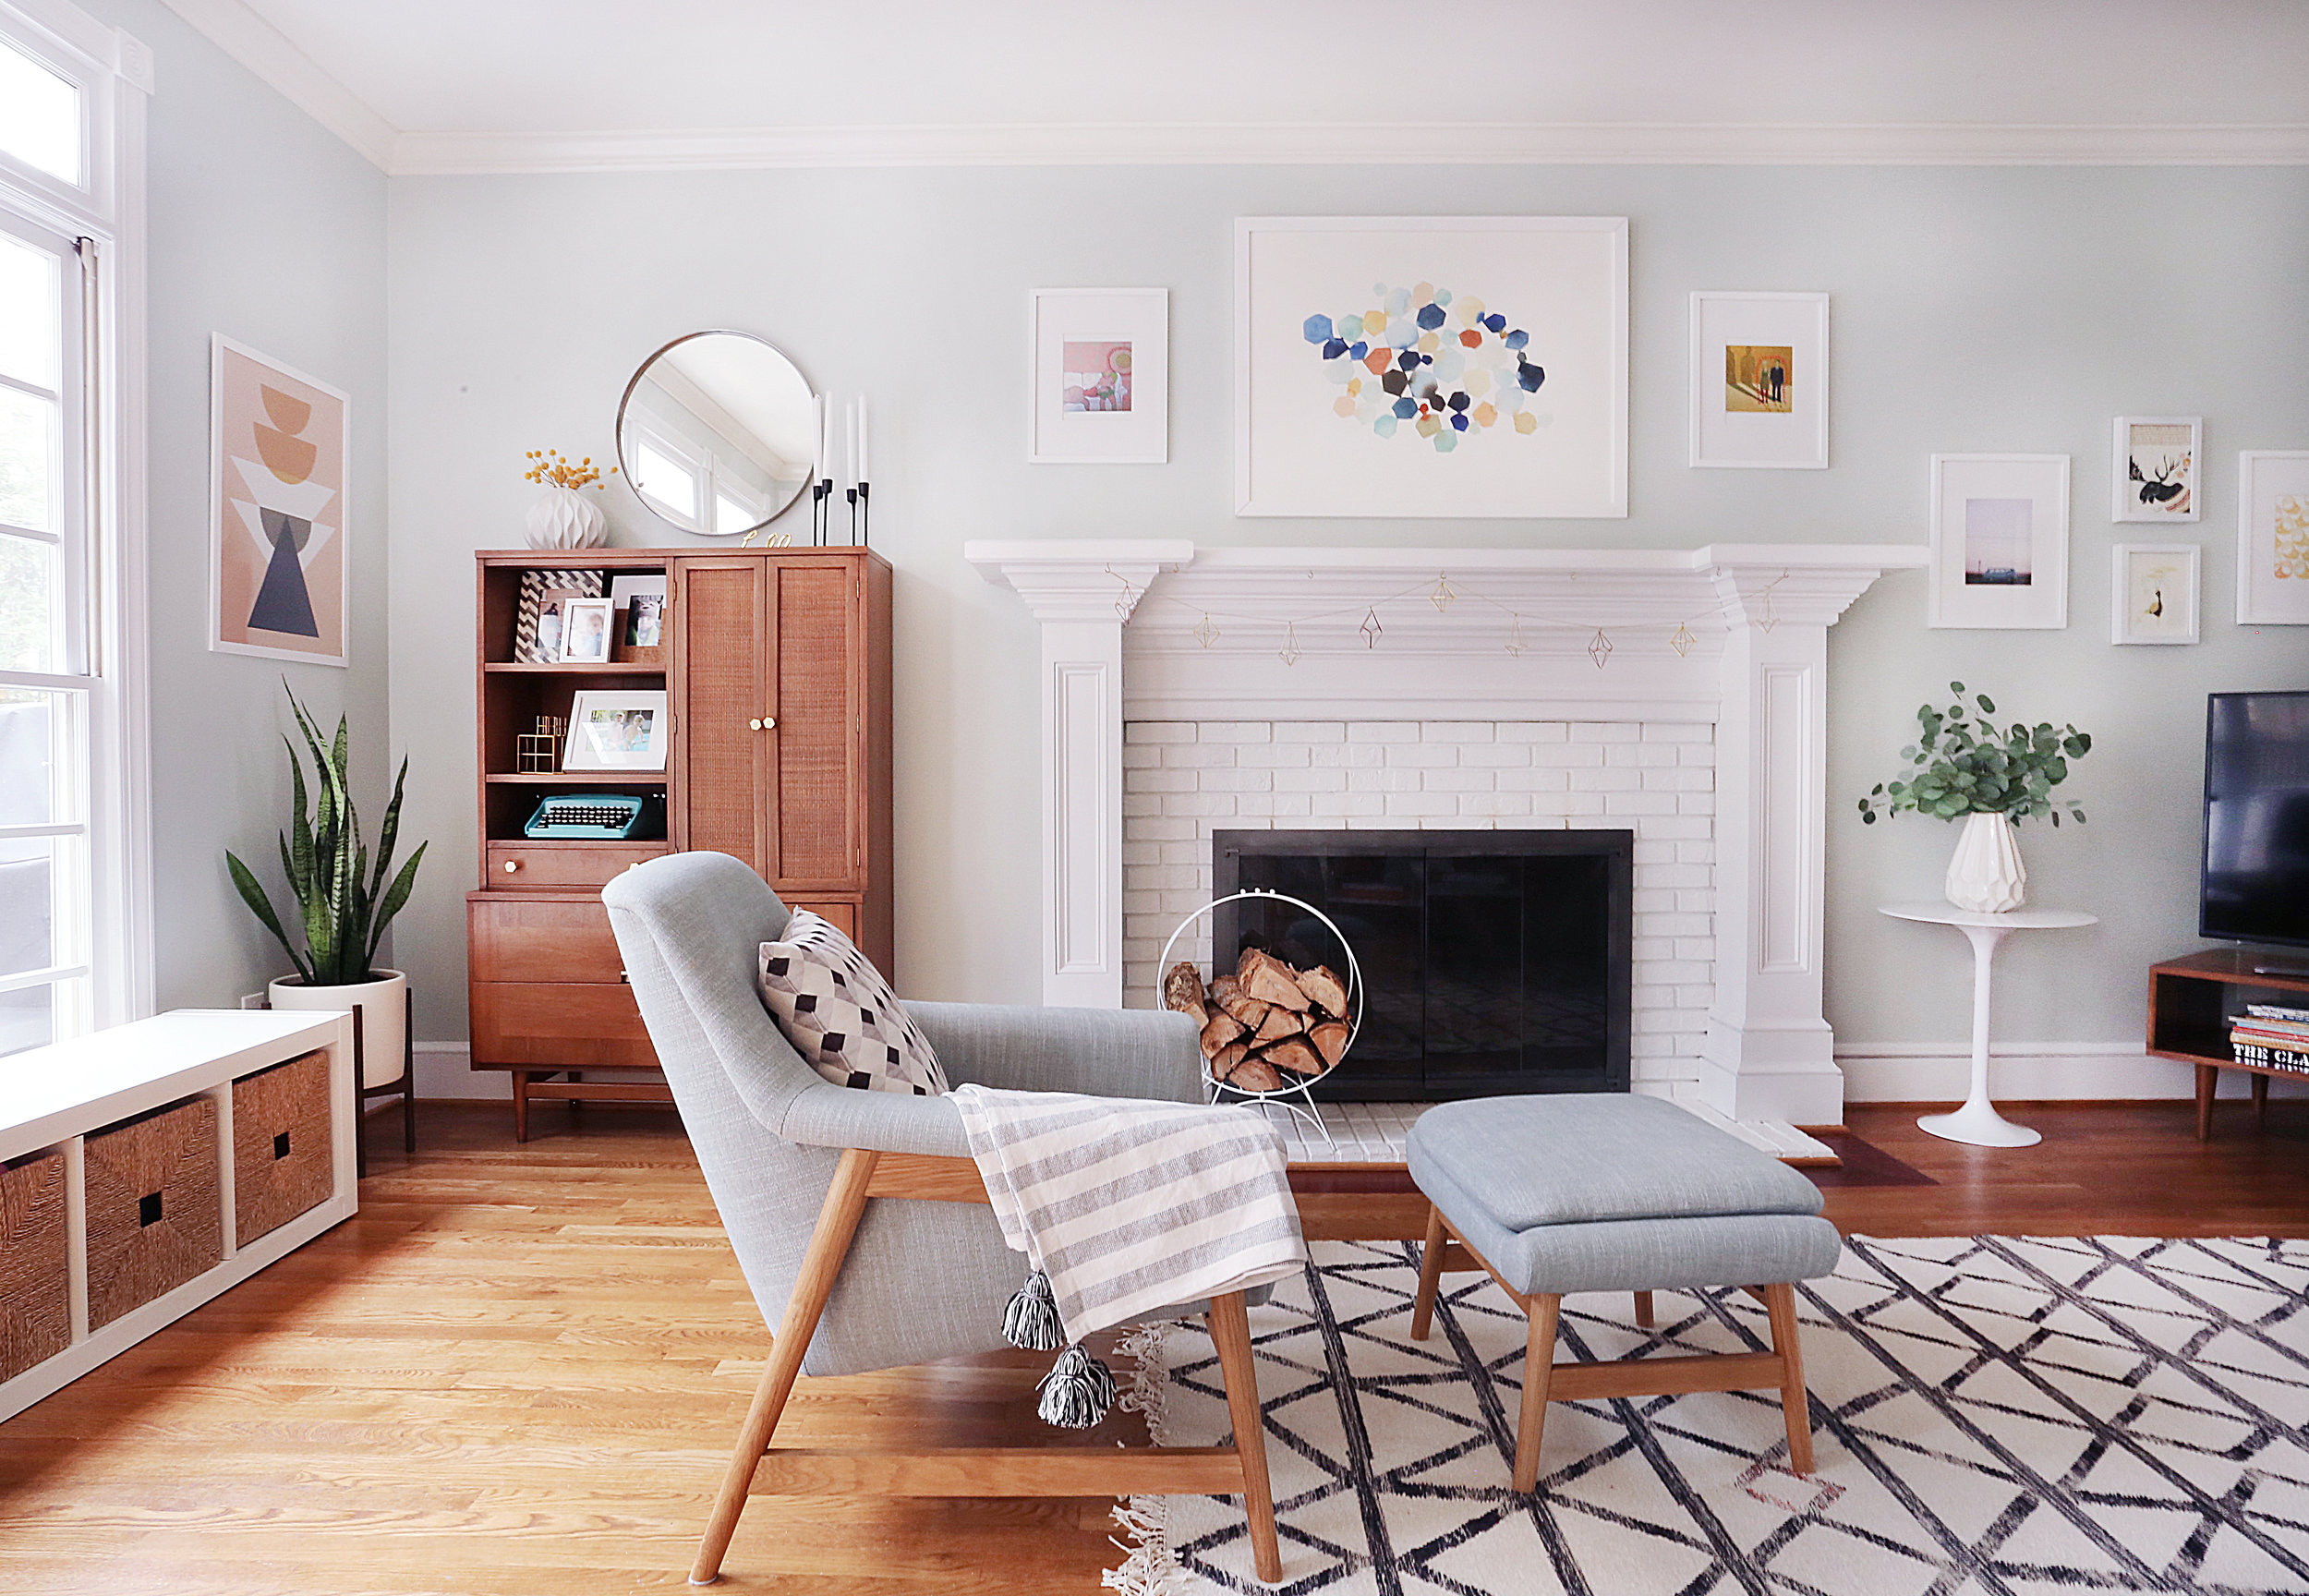
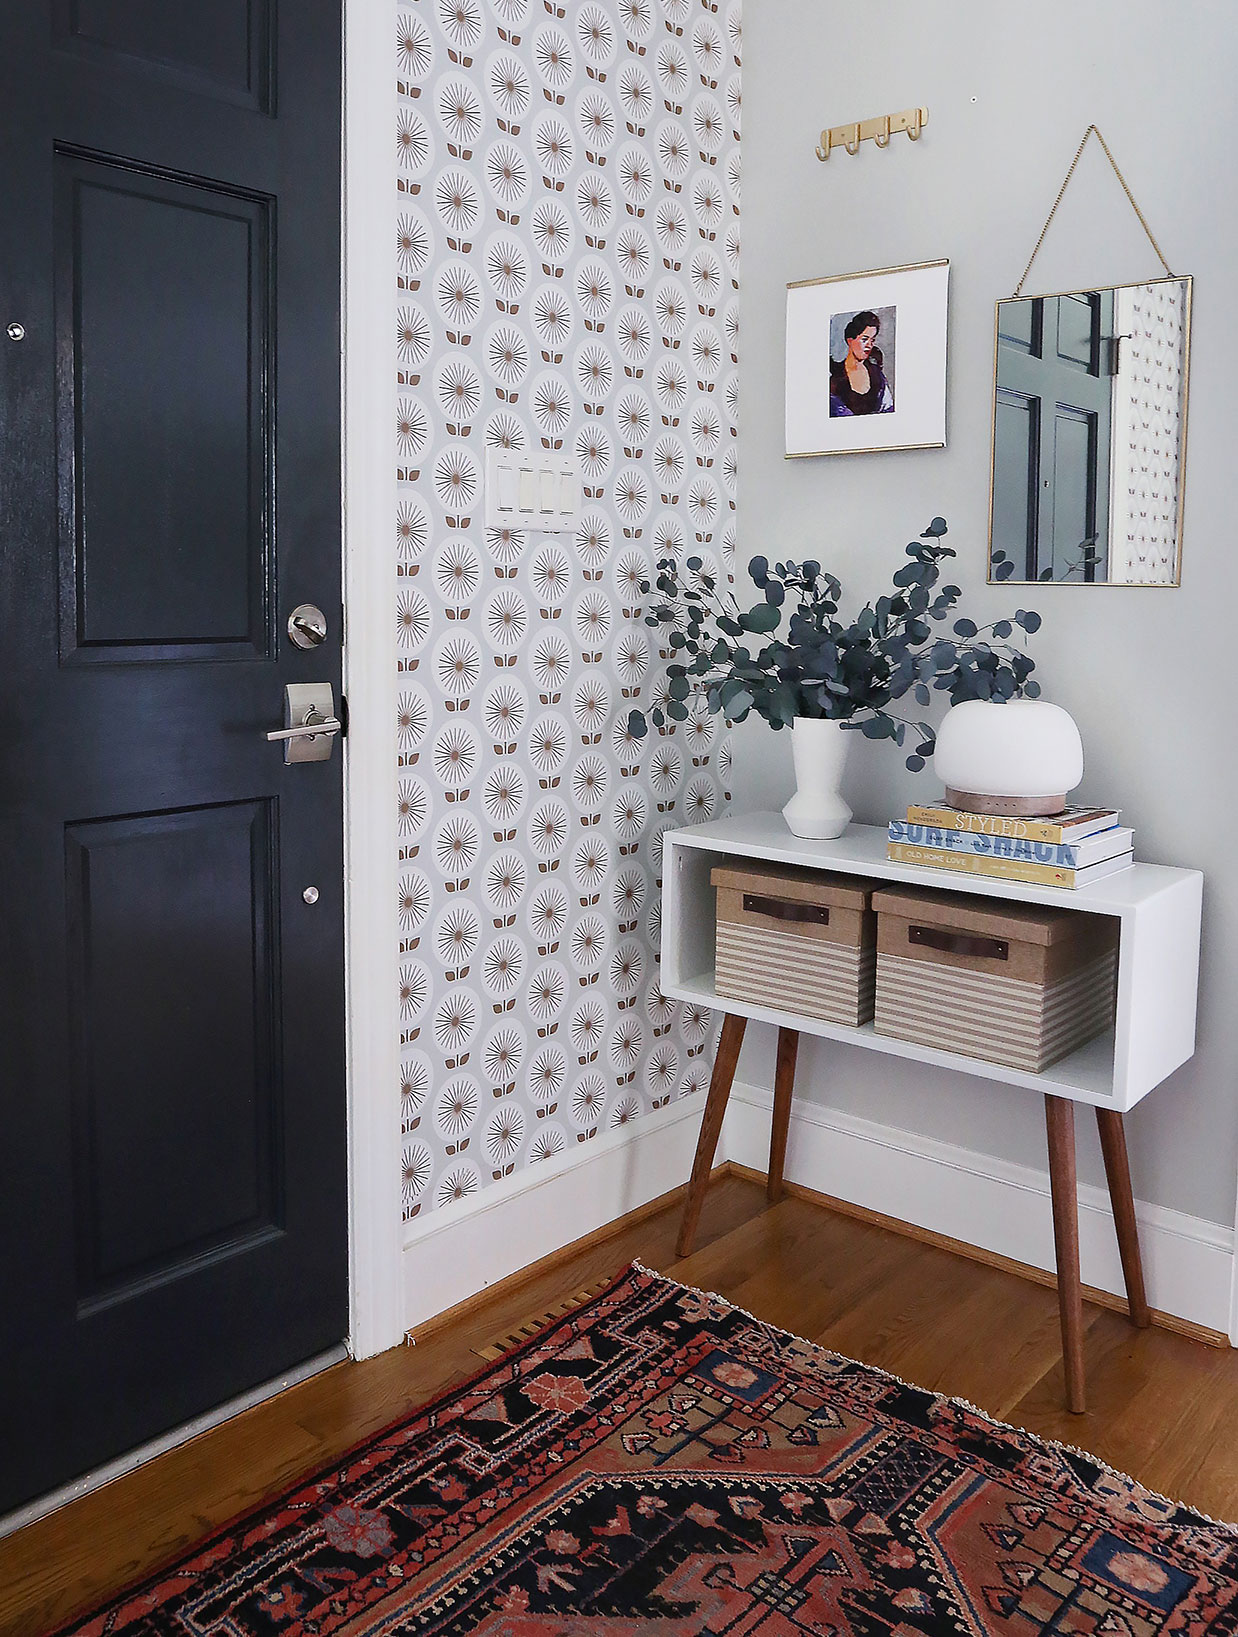
I’ve always admired her warm and minimal aesthetic and how she incorporates simple Scandinavian style into her D.C. Metropolitan home that she shares with her husband, two kids and her adorable pup Teddy. Her biggest inspiration comes from majestic nature and travel. She grew up in Poland and Germany, surrounded by beautiful architecture and traveled a lot when she was growing up.

zigzag-4.jpg

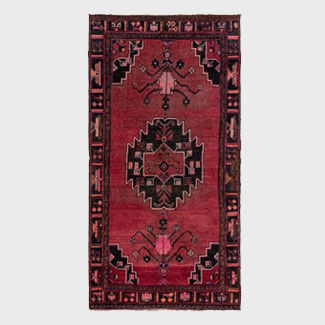
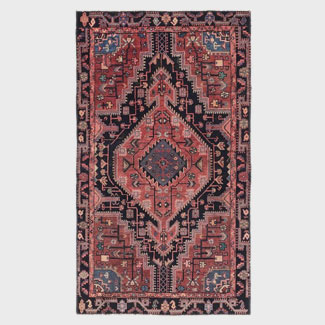
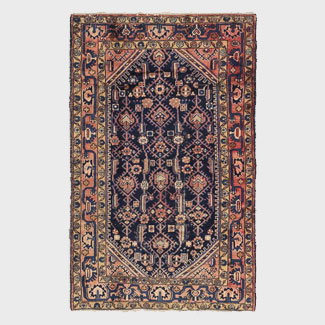
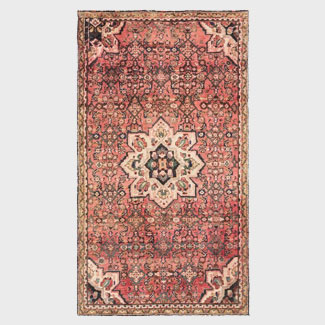
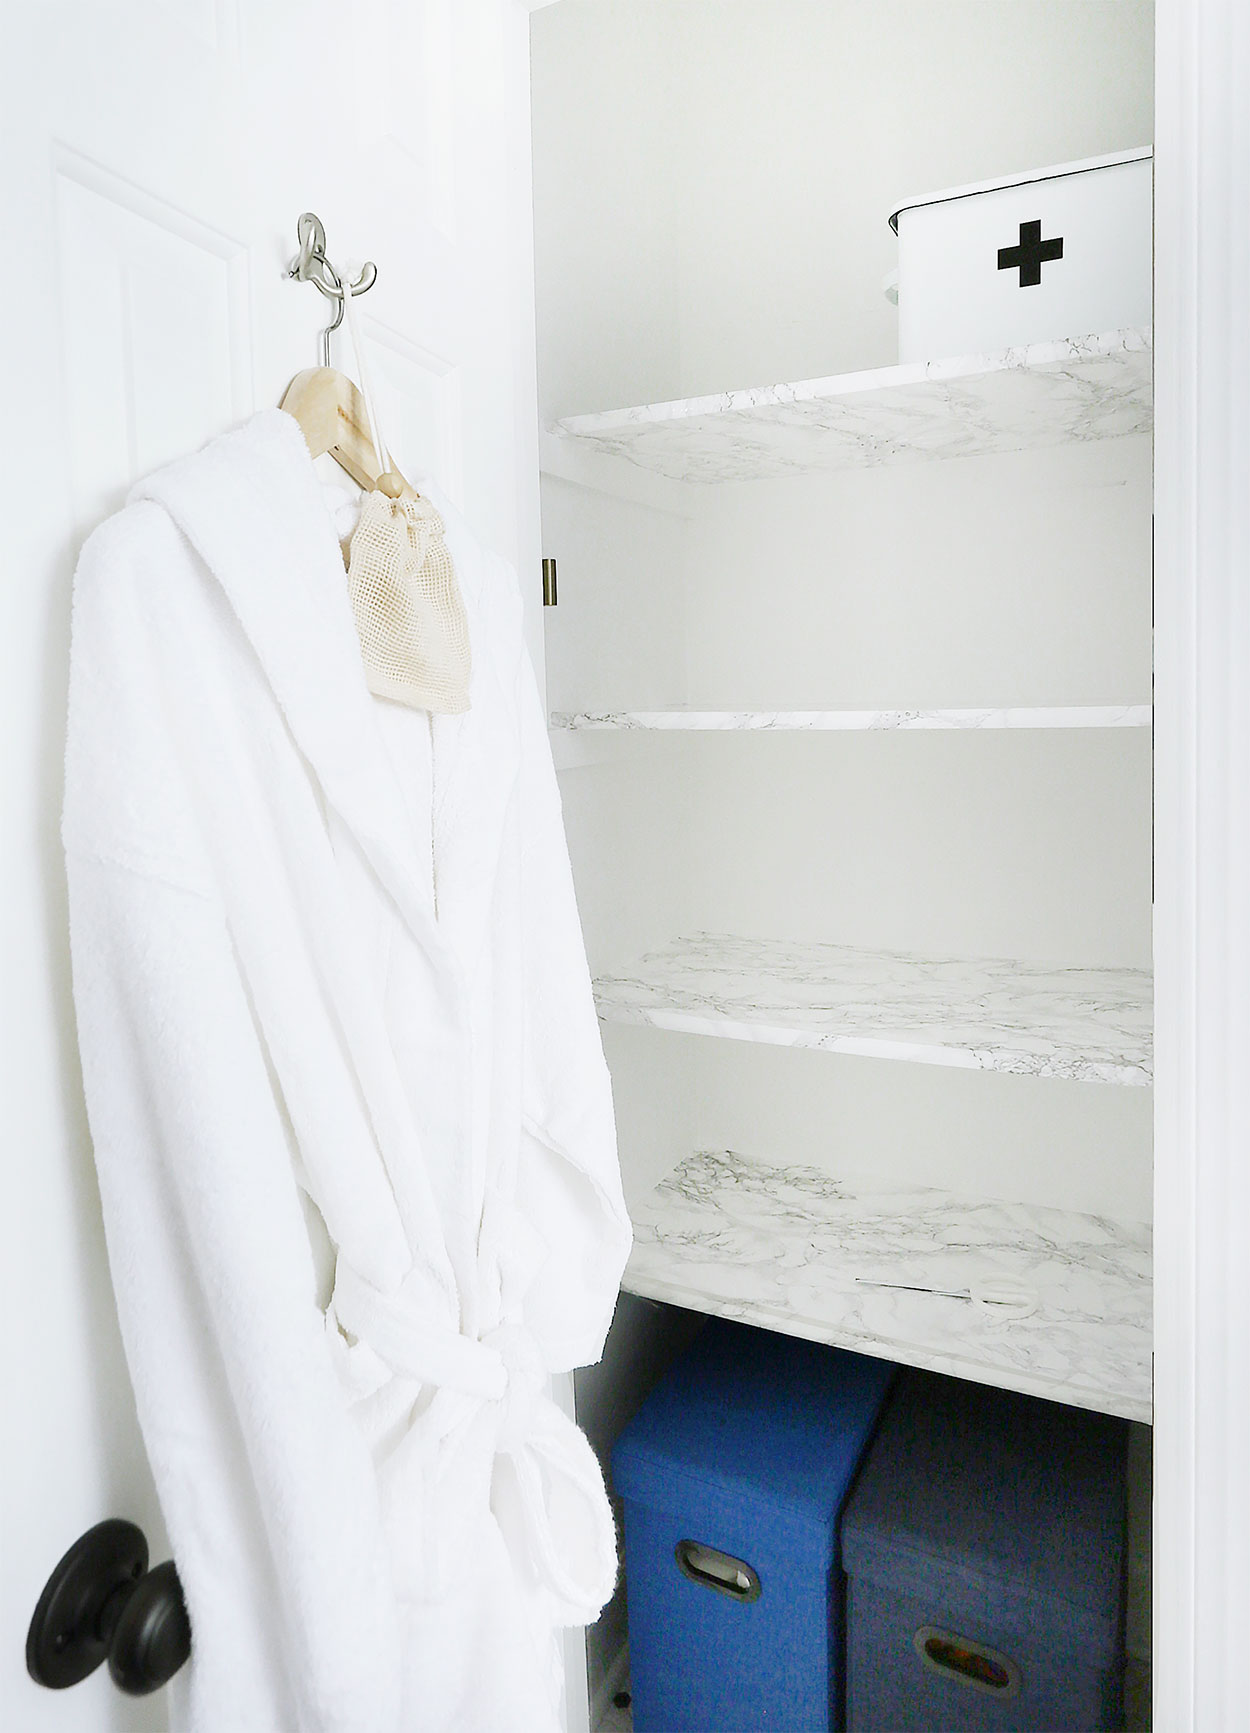
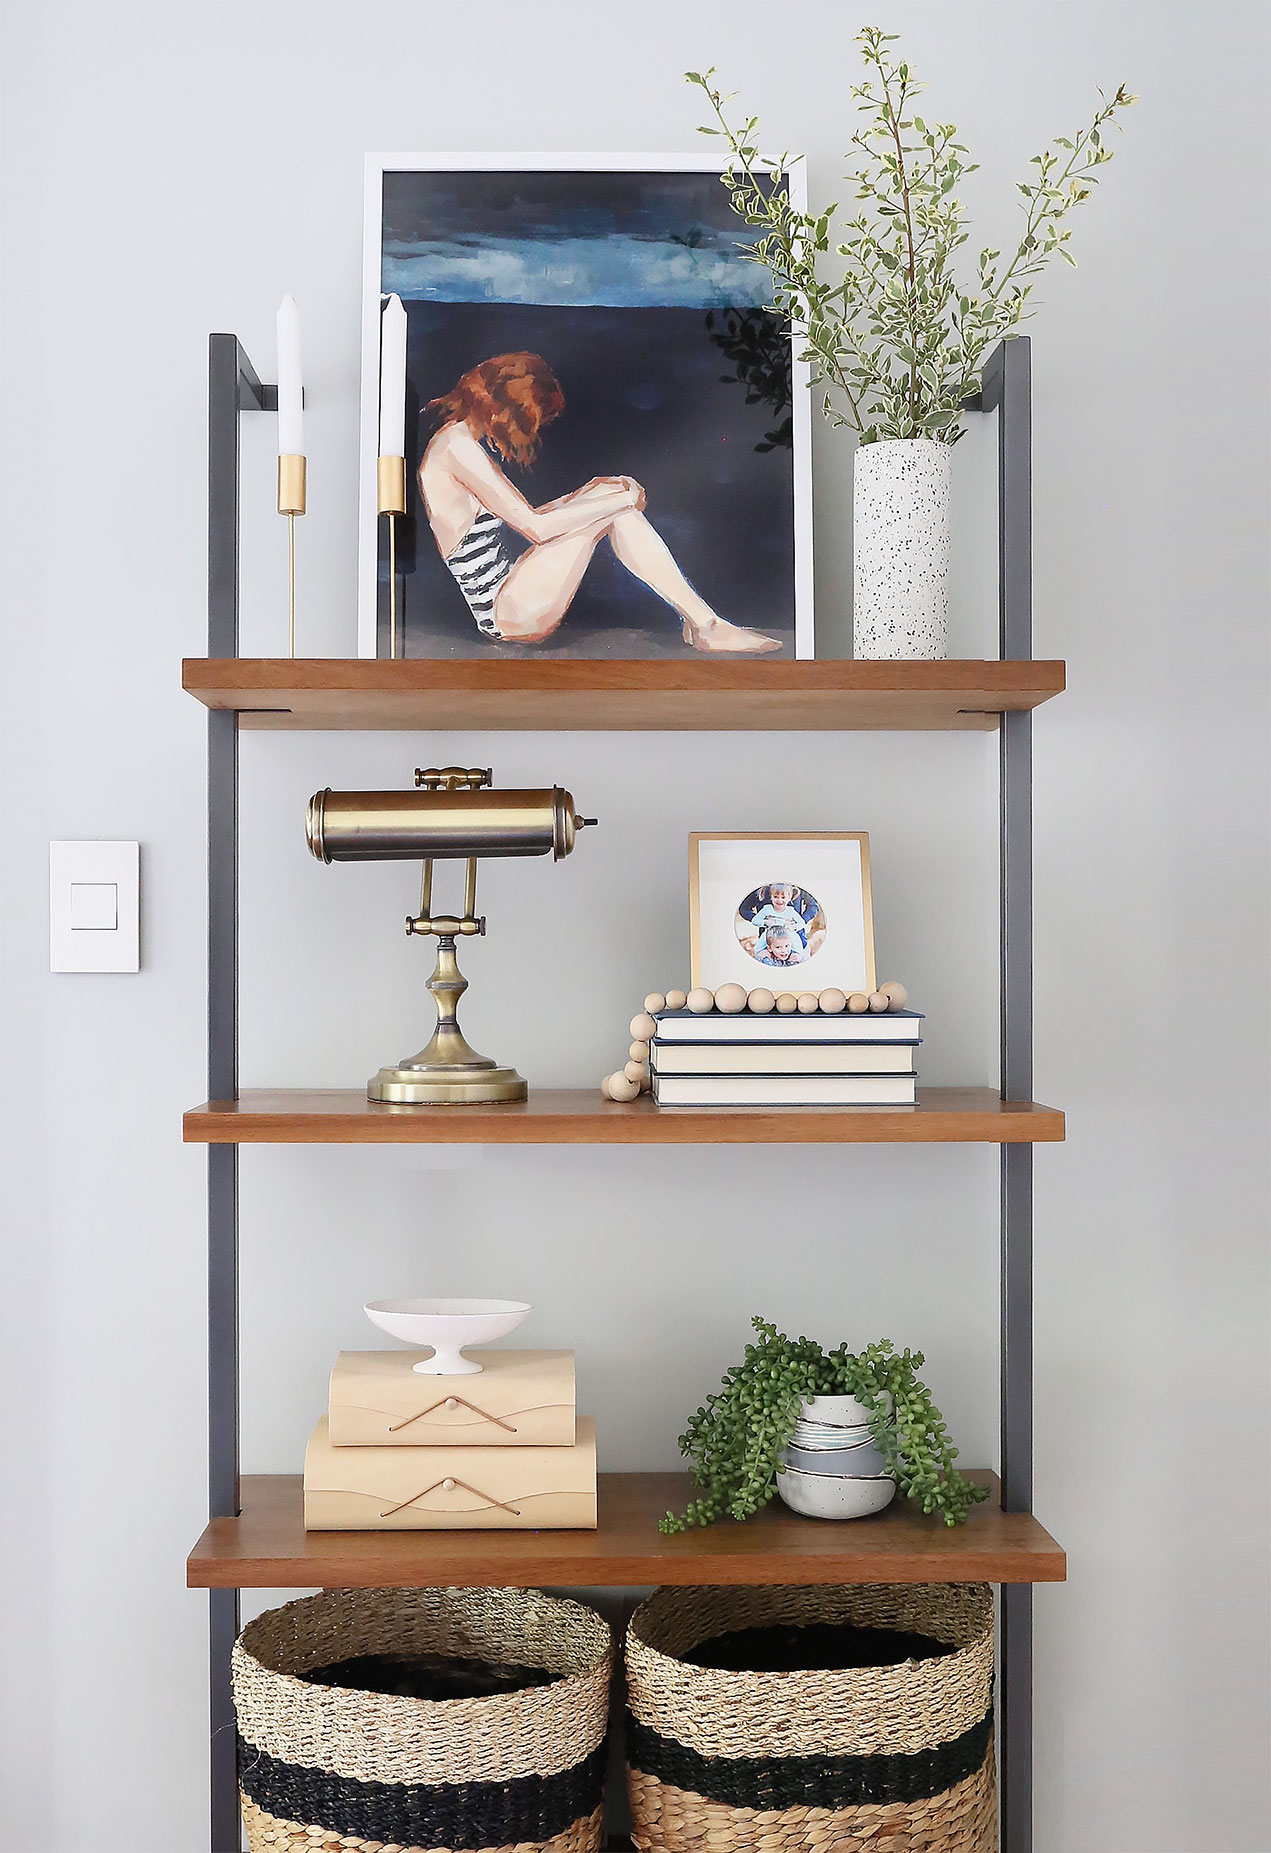
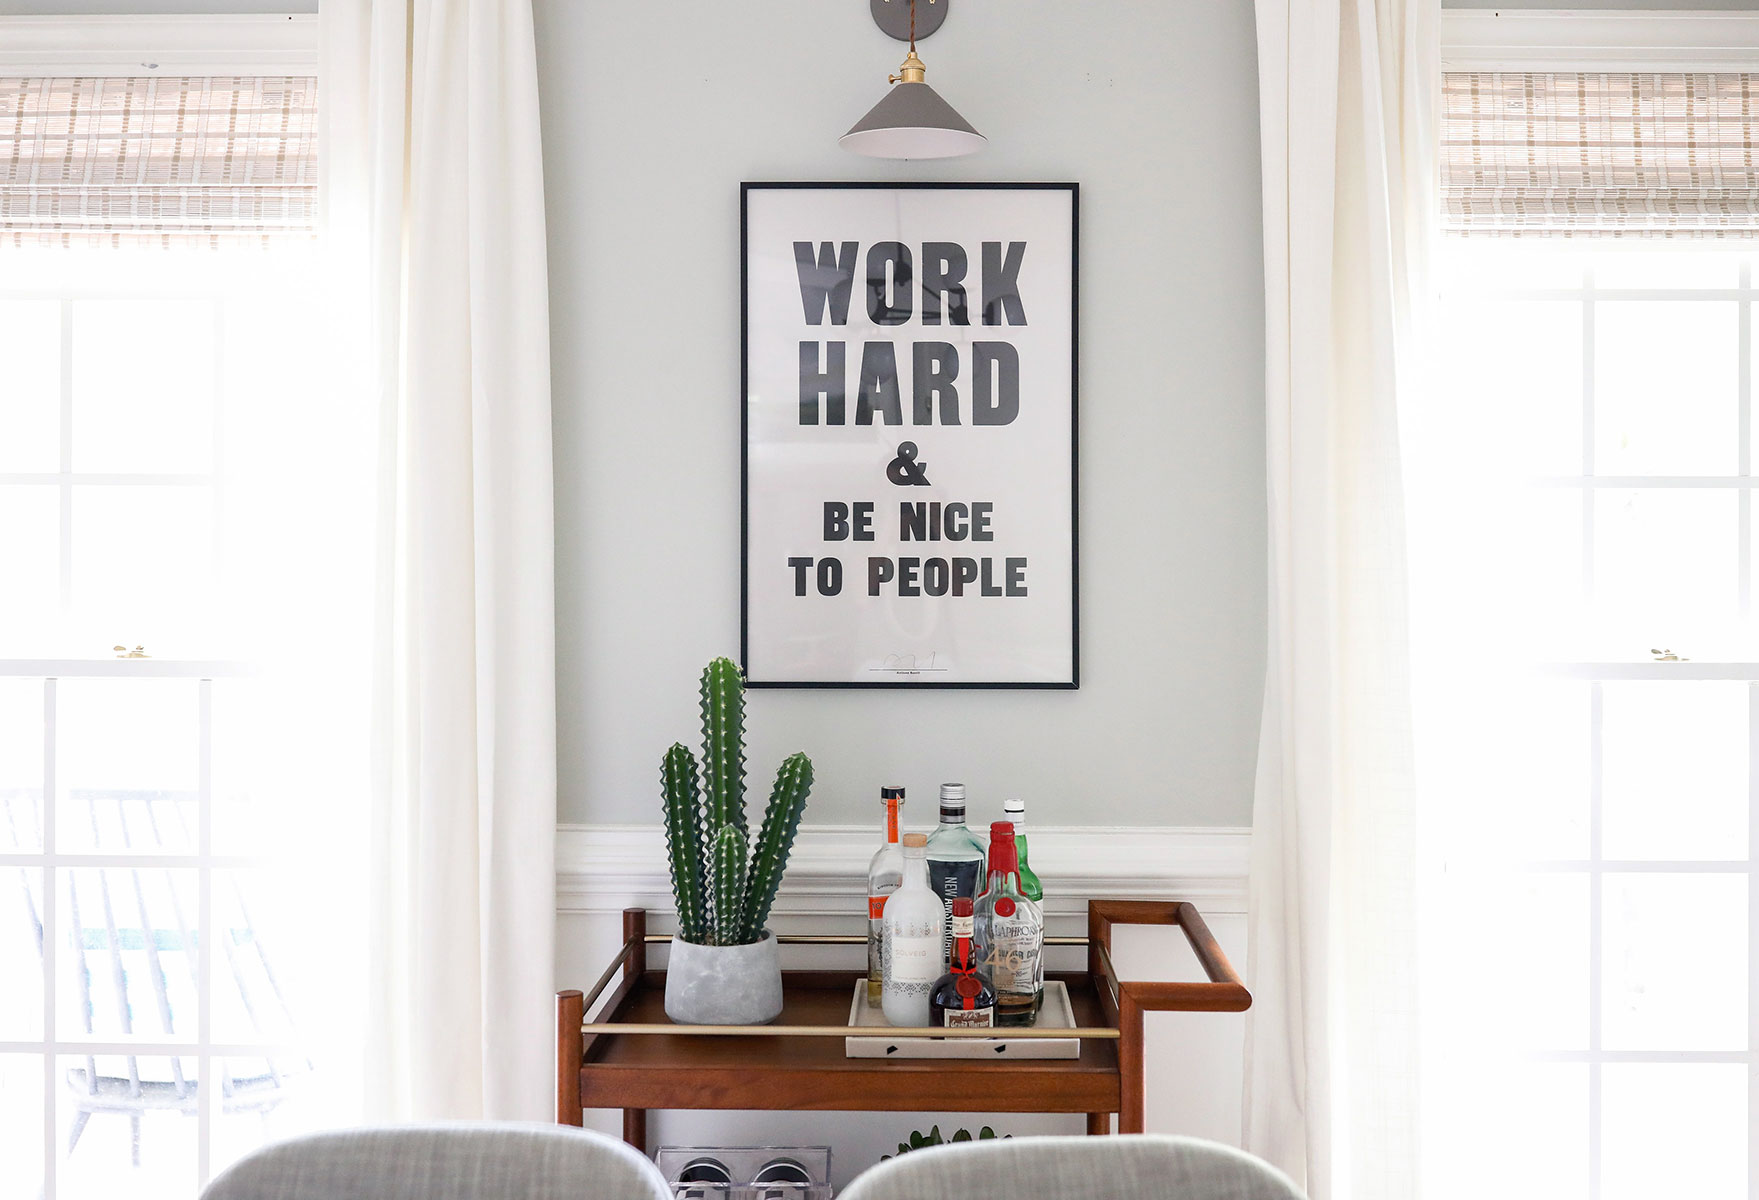
She has a lot of inherited Mid-Century Modern pieces that she pairs with new pieces, mostly made by companies that offer fair trade. She does minimal so very well and loves to decorate with the environment in mind, choosing eco-friendly pieces. She is very intentional with the decor in her home and only brings in things she truly loves – pillows, blankets and soothing colors combined with neutrals set the tone in each room.

zigzag-5.jpg

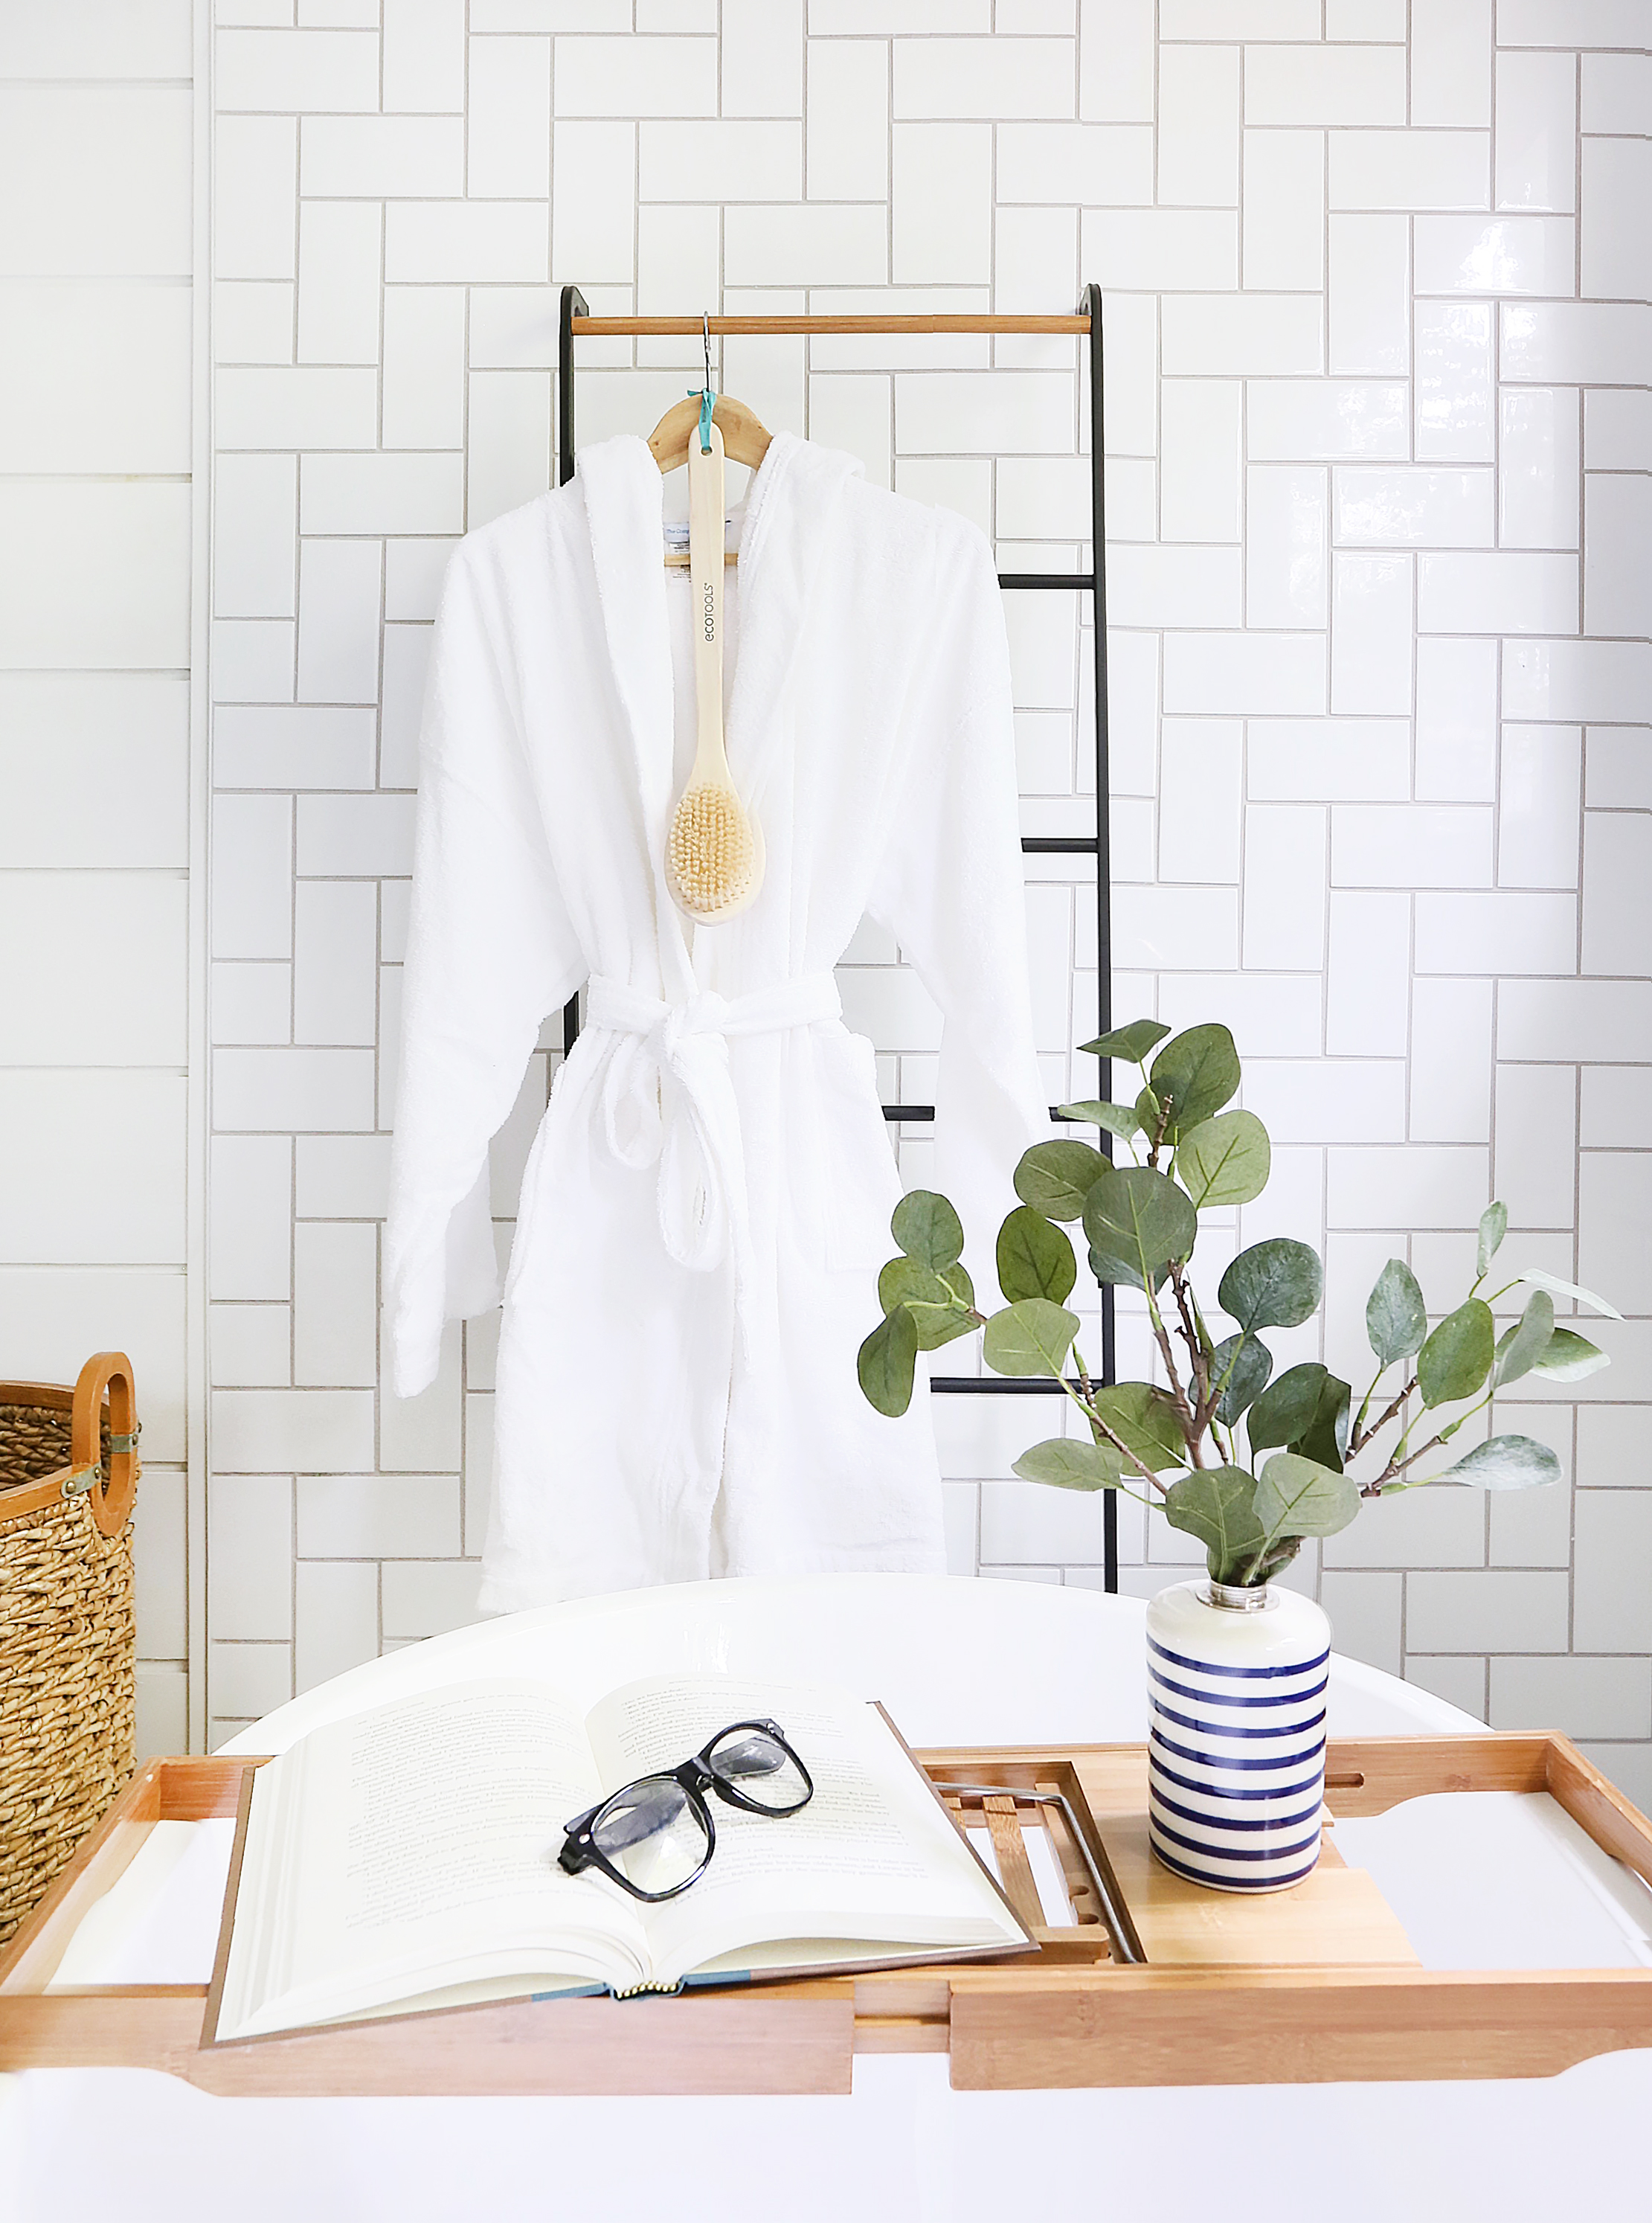
I love how she celebrates the details and the small moments in her home. Good smelling candles, cups of tea and the smell of fresh flowers are some of her favorite things. When she isn’t hard at work in her studio making all those amazing pillows, poufs and most recently paintings you can find her relaxing and enjoying a hot cup of coffee in a sun-filled corner of her home.

zigzag-1.jpg
zigzag-6.jpg
zigzag-8.jpg

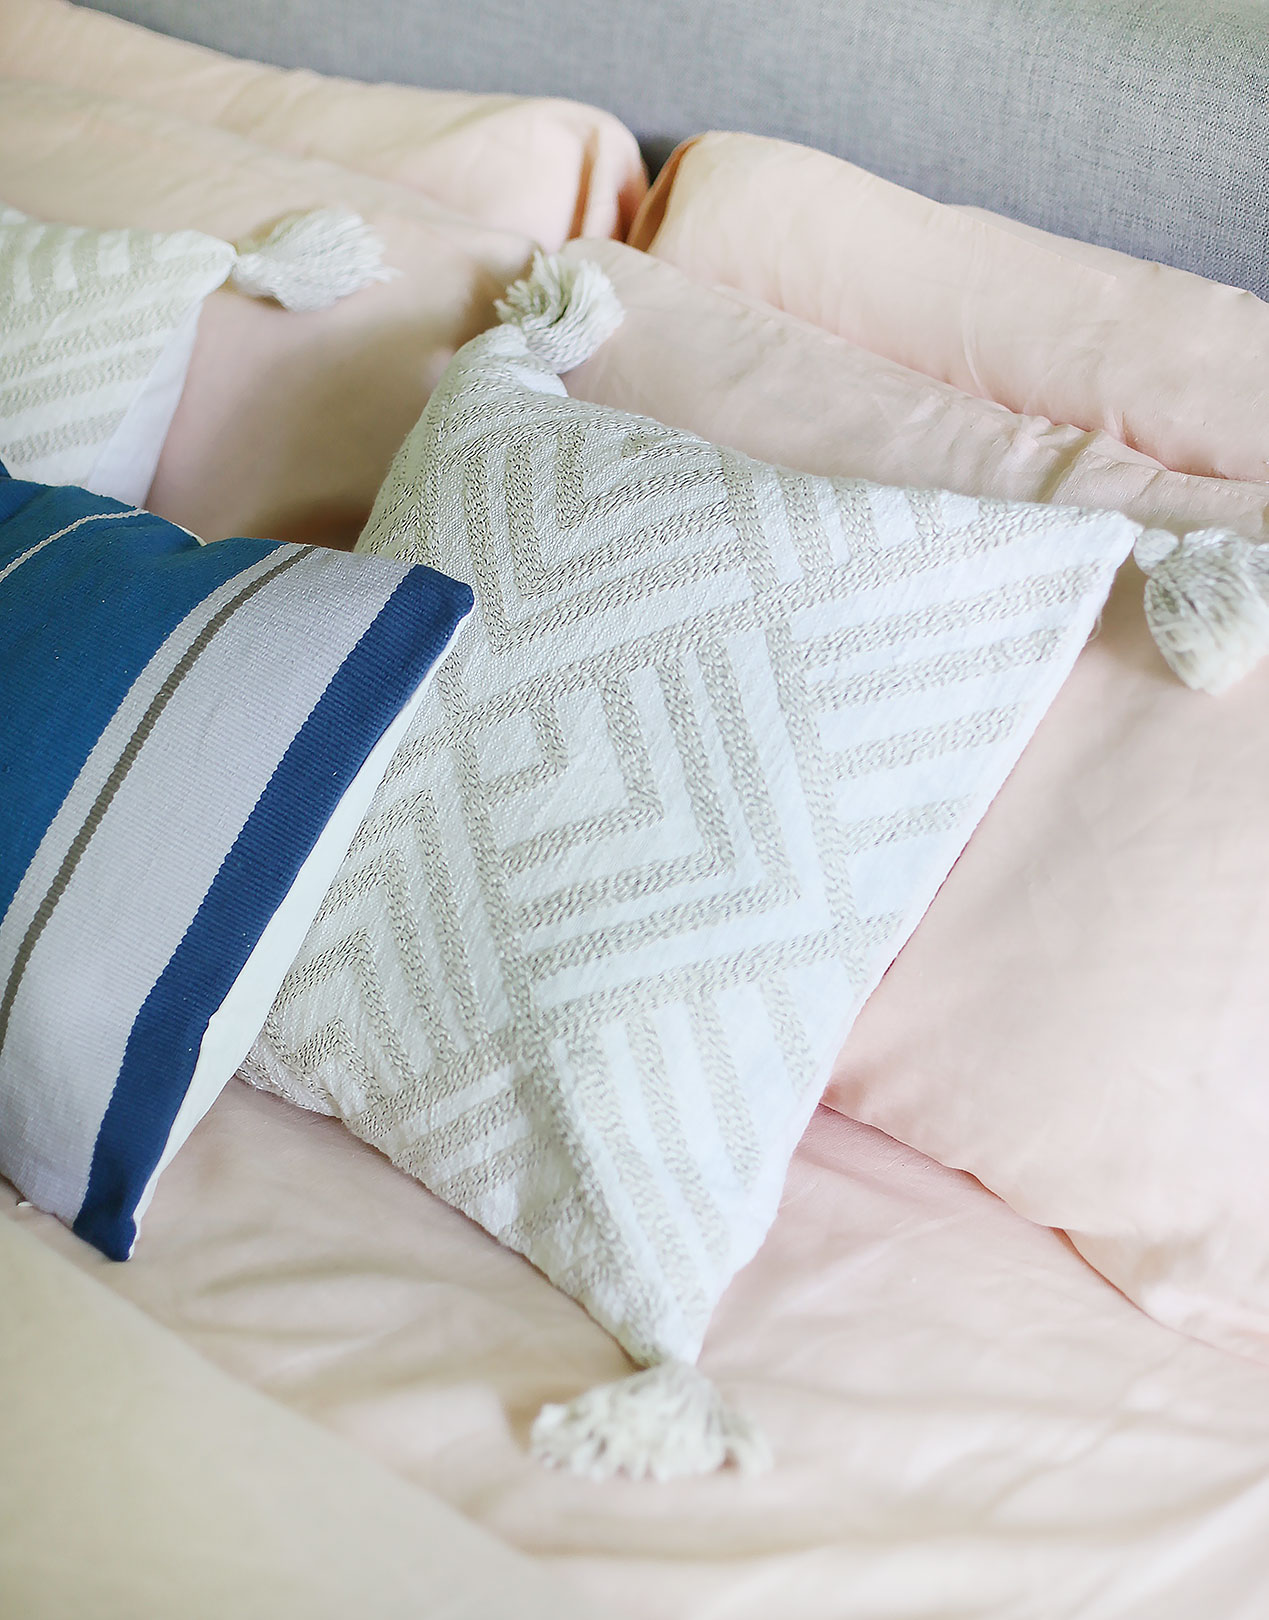
Can’t you just feel all those positive vibes? Monika likes to sprinkle them into all the things and I just love her for that! And speaking of beauty and positivity, I can’t wrap this up without highlighting some of her gorgeous hand-made pillows. Here are some of my favorites with links below:

zigzag-get-the-look.jpg

1 / 2 / 3 / 4 / 5 / 6 / 7 / 8


1 Comment

Living and eating well with Buster + Stella & Chewy's

s&c-post-2-1-blog.jpg

GET THAT DOG OFF THE TABLE! yells my husband as I’m setting up this shot…. haha…. I know, I know…this looks bad but it really is the perfect representation of the rascal that is Buster! And not to worry – we don’t really let him eat out of a bowl on the dining table, but I just really wanted to capture a ‘make you smile’ moment (and maybe a ‘shake your head’ moment from some of you including my husband).

Does Buster really eat food off the table? The answer is yes. He is sneaky like that but its normally food that my kids leave after dinner or a piece of leftover steak sitting on a plate left unattended for a mili-second. He sees an opportunity and takes it! Despite his scoundrel ways, he is a sweet and loving dog who loves his food. Well, really all food but specifically his Stella & Chewy’s raw coated kibble we have been feeding him for the last couple of months.

s&c-post-2-4-blog.jpg

I love what Stella & Chewy’s stands for when it comes to feeding your pups – quality ingredients responsibly sourced from farmers and ranchers they know and trust. Their kibble is 68-70% meat and animal ingredients with no added hormones or antibiotics.

s&c-post-2-3-blog.jpg

In addition to feeling good about what I’m feeding him, I have seen lots of improvements in Buster’s overall demeanor since switching him over to Stella & Chewy’s kibble:

• his energy levels are through the roof

• his bathroom habits are much more controlled and regulated (not to mention less poop
accidents in the house)

• his coat is extra healthy and shiny

• he just seems happier and healthier

s&c-post-2-5-blog.jpg

I mean, that face! It says…’love me' and ‘feed me, please’! Don’t worry Busty, we got you! Now keep off the table and quit barking at the mail carrier!

If you are interested in learning more about Stella & Chewy's approach to creating high-quality foods for pups and trying it out for yourself, you can read all about it here and get a $3 printable coupon: https://www.stellaandchewys.com/seeking-better

This post is sponsored by Stella & Chewy's. All thoughts and opinions are my own. Thank you for supporting content that keeps Sunny Circle Studio going!

Comment

The happy Nola home: the kitchen

Hello and happy Friday! Today, I’m going to walk you through one of the brightest and cheeriest kitchens you ever did see! This kitchen is another really amazing space in this incredible New Orleans house that I’m so pumped to share with you. And man, its good! I wish this was my kitchen!

First, a little bit about the plans for the space and some amazing before pictures in all their 90’s beige/brown/Formica glory:

IMG_8976.jpeg
IMG_8975 2.jpeg

My clients worked with Angela Murtagh to re-think and re-configure the layout. At 12 1/2 feet wide, it’s a very narrow space but they knew they could maximize space by opening up one of the walls between the kitchen and the living and dining areas. In addition to changing the basic footprint, they also nixed the top row of shelves in favor of all that glorious open shelving (made from Cypress and installed with these metal brackets) and installed new custom cabinetry and appliances.

big-side-kitchen-4-low.jpg

How pretty is that view? The black and white from the kitchen mixed with the warmth from the original heart pine floors and 200 year old Cypress beams makes my heart sing! Its such a bright and magical place! My client’s taste leans more modern and they wanted the kitchen to feel simple, clean and flow with the rest of the living and dining areas. To keep things cohesive, we painted the entire house BM Chantilly Lace and chose that beautiful quartz countertop, paired it with custom shaker cabinetry designed and sourced from Itty Bitty Kitchens and those amazing matte black Schoolhouse pulls.

big-side-kitchen-6-low.jpg

My clients are big coffee people (and I got all the good New Orleans coffee during my stay) so we created this little coffee station moment in this corner and pulled in the same Cypress wood for more open shelving. I can’t get enough!

big-side-kitchen-7-low.jpg

Let’s take a peek at the other side of the kitchen and enjoy that bold contrast and impact from the matte black stainless steel hood vent! I can’t really take credit for that choice - it was all my clients and so affordable ($140)!

big-side-kitchen-2-low.jpg
big-side-kitchen-9-low.jpg
big-side-kitchen-1-low.jpg

We bought those fresh croissants that morning from a bakery in the French Quarter and they just sat there for hours taunting us with all their delicious buttery goodness. We had to hold strong through because food makes the best styling props! Don’t worry…they were taken care of after the shoot. Truly, I had some of the best food of my life while in New Orleans!

big-side-kitchen-11-low.jpg

I’d also love to take a moment to truly appreciate these open shelves! They are made from Cypress and are the prefect warm balance against all the black and white in the kitchen. After a couple of days of styling and then using them, I started to think of ways I could install them in my own kitchen! That sconce was an amazingly affordable find that really completed the space. It was surprisingly substantial and well-made for being under $50!

big-side-kitchen-10-low.jpg
big-side-kitchen-3-low.jpg

Man, I wish this was my actual kitchen! I did very little editing to these images - it really is that bright and happy! What do you guys think?

If you are into this look, I created a little graphic below with all the sources (some actual and some similar):

nola-kitchen-get-the-look.jpg

1 / 2 / 3 / 4 / 5 / 6 / 7 / 8 / 9 / 10 / 11 / 12 / 13 / 14 / 15 / 16 / 17 / 18 / 19 / 20 / 21 / 22

This post does contain some affiliate links meaning if you purchase something you've clicked on, I will get a small commission. I only promote the products I truly love though!

2 Comments

The happy Nola home: the master bedroom

Welcome to the happiest little home in New Orleans! I am so over the moon excited to finally start sharing this project that I have been quietly working on for months. Before I dive into all the master bedroom details, here is a little bit of a backstory on this amazing house: It’s a typical New Orleans shotgun house (narrow rectangular house, with rooms arranged one behind the other and doors at each end of the house), with 2 separate sides that was built in 1914. The house had previously been renovated (possibly in the 80’s or 90’s) with vinyl flooring, lots of beige and builder-grade finishes and my clients ripped it all out and restored it to its original glory! They vaulted the ceilings (13 ft!), added those amazing 200 year old reclaimed Cypress beams and restored all of the original heart pine floors. They also made some changes to the footprint of the house, uncovered hidden original chimneys and added long rectangular windows that literally flood the rooms with natural light. This house is basically the definition of goals!

My part came in with most of the design and styling decisions. My clients (who are the best) basically gave me full reign to add a dose of happy style to the house and I did that with wall treatments, lots of art, color and plenty of texture. We also worked together to choose bathroom finishes, tile, rugs and some of the furniture. Seeing it all come together in person was so rewarding and with that said, lets dive into my favorite room in the house: the master bedroom.

The before

We all love a good before/after and this is GOOD. Like I mentioned, the house was an 80’s beige canvas before.

IMG_0089.JPG
IMG_0092.JPG
IMG_0094.JPG

During the renovation, they took out the back door, removed the vinyl flooring, took out all the closets and old window and replaced with 2 new taller windows and 2 rectangular windows on the back wall. They also added an adjoining bathroom, replaced all the standard door and door frames with 8’ doors, painted (the whole house is painted BM Chantilly Lace) and added those amazing Cypress beams.

The After

big-side-master-bed-1-low.jpg
big-side-master-bed-7-low.jpg

This might be my favorite room ever! Its just so simple and happy with beautiful architectural details and that graphic punch from the accent wall. And look at this before and after:

before-after-master-bed-1.jpg

The wall behind the bed was tricky because of the size and the windows. The room already had so much happy character, but it still needed a burst of color and life. Enter these amazing inky floral decals from Urban Walls! I love these so much that I want to use them in my home (that always happens!) As soon as we started to install them, I immediately knew it was the best decision ever!

big-side-master-bed-5-low.jpg

The walls and trim are painted BM Chantilly Lace (one of my favorite whites) and we kept most of the other decor pieces pretty simple so the florals could be the star of the show! I love the warmth from the wood tones in the bed and nightstand paired with the texture of that rug (which is awesome and so affordable).

big-side-master-bed-3-low.jpg
big-side-master-bed-2-low.jpg

I’m so happy with the way it turned out and my clients were too (which is so awesome). They were a bit nervous about using decals but I assured them that these would be amazing and they delivered on that promise!

What do you guys think? Let me know in the comments! And stay tuned to my blog through out the next couple of weeks as I share more rooms from this amazing home!

If you are curious as to where everything is from, I’ve rounded up all the sources for this room below:

nola-master-bed-get-the-look.jpg

1 / 2 / 3 / 4 / 5 / 6 / 7 / 8

This post does contain some affiliate links meaning if you purchase something you've clicked on, I will get a small commission. I only promote the products I truly love though!

3 Comments

Styling guide: the bar cart

bar-cart-1-blog.jpg

Happy weekend, friends! This post was originally intended to go up yesterday but life happened so I had to delay. We can still enjoy our favorite cocktail on a Saturday night instead, right?! Technically I’m not talking about cocktails but styling out the place where you corral and assemble your favorite cocktail ingredients – the bar cart!

bar-cart-styling-guide.jpg

Today, I’m going to highlight 6 elements you can add to your bar cart to give it a dose of happy style! Let’s dive in:

Pretty Bottles

This kinda goes without saying that you need booze for your bar cart, but I like to include some pretty bottles to put on display. I am after all a graphic designer, so I very much appreciate good design in all forms, especially packaging. We are big gin/tonic and vodka/soda people so we have a fair amount of those types of liquors on hand but my husband also enjoys a whisky or bourbon nightcap from time to time. I recently got a beautiful bottle of bourbon from Oak & Eden and I just love anything from Far North Spirits. Other bottles that I love (and available at your local ABC stores) are Reyka Vodka and Hendrick’s Gin.

bar-cart-2-blog.jpg

A Tray

This helps to organize and corral all your bottles together. Stick a tray under any grouping of items in your home and it immediately feels more styled and put together. Simple and easy! I recently found this really heavy circular one from Target and I love the contrast of the round shape and light texture against the dark rectangular cart.

Something Living

With no exceptions – every vignette should include something living. Or in my case, something faux that can pass for the real thing. Try using a bunch of flowers, a plant and/or even a small bowl of limes or lemons to add life, color and movement to your bar cart. This tip works in any vignette in your home!

bar-cart-5-blog.jpg

Glassware / Copper Mugs

This is kinda another given on any bar cart to add style and symmetry and I love incorporating a couple of copper mugs into the mix for color and texture. I’m not terribly fancy and find the most beauty from simple shapes. I got these tall tumblers from Target (they were $2.50 each!) and paired them with my copper mugs. If you dig the look of copper, I recently found these and think they would be amazing on display!

bar-cart-4-blog.jpg

Decorative Object / Vessel

This will add a bit of personality and interest to your vignette. I go back and forth on putting something decorative vs functional in my bar cart and I lean towards the latter. I recently got that Terrazzo bowl from Port of Raleigh and I love the texture it adds.

Art

Last but not least, adding art will give your bar cart a bit of personality and add visual interest. Personally, I like to hang the art around my bar cart, but leaning a smaller framed piece on one of the shelves would also work very nicely and add some height. I love my Schoolhouse Electric print and really any of their art would be lovely on or around a bar cart. I say choose art that you love and makes you happy!

No go forth and get your booze styling on! And when you are done, sit back and relax with a refreshing cocktail and enjoy the view!

If you are into any of the items on my bar cart, here is a handy little graphic to reference with links below:

bar-cart-get-the-look.jpg

1 / 2 / 3 / 4 / 5 / 6 / 7 / 8 / 9

This post does contain some affiliate links meaning if you purchase something you've clicked on, I will get a small commission. I only promote the products I truly love though!


7 Comments

Shop tour: Port of Raleigh

por-1-low.jpg

Welcome to Port of Raleigh! One of my favorite places to shop for modern home and lifestyle pieces. The store has a beautifully curated collection of thoughtfully-designed pieces that find the perfect balance between form and function.

The Story

I had the chance to hang out in the store a few weeks back and chat with the lovely owner, Ana Maria Muñoz. We talked inspiration, design and blogging among other things and I got to know a little bit more about her background and why she opened her amazing store. She was born in Australia to Colombian parents, raised in Los Angeles and lived in London and Kuala Lumpur before coming to Raleigh. When she and her husband moved to Raleigh in 2014 to start their family, she saw an opportunity to share her passion for everyday design-driven goods. Ana Maria is passionate about the home being a special place with special things in it, even the most mundane of them. She believes that through good, simple design, these things we live with and use daily can be useful and artful, purposeful yet clever, and perhaps most important, refreshingly modern yet timeless. With those ideals in mind, she opened Port of Raleigh on December 5, 2015 followed by a web-store launch in March of 2017. 

por-6-low.jpg

The Store

Port of Raleigh is a design store for the comforts of home and enjoyment of the everyday. They believe that every day objects can have transformative powers and can make all the difference in how you experience an activity, your interior spaces and your on-the-go life. And they like them modern with clean lines and timeless qualities. Simple but still unexpected. 

por-4-low.jpg
por-11-low.jpg

I remember the first time I walked into the store, I did a little happy dance! Everything is so simple and thoughtfully-designed, ranging from clocks and amazing lighting to things like pot holders and even dust pans! I love that these everyday things can be functional and equally beautiful!

por-3-low.jpg
por-15-low.jpg

They work with independent and emerging designers around the world as well as longtime loved and respected brands that continue to add a fresh take on design. Their curation is playfully polished with a focus on functionality, clean aesthetics and intrigue. They love Scandinavian and Japanese designs and are excited that new small American design studios have started creating designs with similar ethos.

por-8-low.jpg
por-7-low.jpg
por-10-low.jpg

I’m not kidding when I say I would buy all the things in this shop (and I have bought quite a bit over the years). Anna Maria has impeccable taste and is the the sweetest and most approachable person you could meet! It’s a delight to walk into her amazing store and take in all the inspiring design details and I love supporting a local business too (plus Poole’s Diner is right next door and if you haven’t been there, you must go and get the mac & cheese)!

As a special treat to my readers, they are offering 10% off their web store with the code SUNNY10 for the next week.

I’ve rounded up a few of my favs from the store, all available online:

por-favs.jpg

1 / 2 / 3 / 4 / 5 / 6 / 7 / 8 / 9 / 10 / 11 / 12

por-9-low.jpg
por-2-low.jpg

If you are ever in the Raleigh area, pop in and visit! They are located in downtown Raleigh in walking distance to great restaurants as well as Red Hat Amphitheater. In the meantime, head on over to their website where you can learn more and check out their online shop.

Thanks for reading!

1 Comment

15 beautiful vintage-inspired rugs under $500

west-elm-home-tour-ERIN-WHEELER-017.jpg

If you happen to catch my post from earlier in the week, it was all about affordable vintage rugs. Where to find them and why I love them in my home and my client’s homes for so many reasons. These rugs are extremely popular, versatile and one of a kind, making their availability in short supply.

west-elm-home-tour-ERIN-WHEELER-010.jpg

With that rise in popularity, there is a ton of really great vintage-inspired and budget-friendly options out there for folks looking for that distressed style and immediate availability. I found lots of great choices from Lulu & Georgia, Overstock, RugsUSA and Urban Outfitters to name a few, all beautiful and under $500!

I rounded up 15 of my favorites below, some of which are in my shopping cart as we speak!

15-vintage-inspired-rugs.jpg

1 / 2 / 3 / 4 / 5 / 6 / 7 / 8 / 9 / 10 / 11 / 12 / 13 / 14 / 15

This post does contain some affiliate links meaning if you purchase something you've clicked on,  I will get a small commission. I only promote the products I truly love though!

4 Comments

The best sources for affordable vintage rugs

bathroom-vintage-rug.jpg

One of the most frequent questions I get asked on Instagram is where is that rug from? Specifically, that vintage rug. Its no surprise that these rugs are so popular – they’re oh so beautiful, very versatile, kid-friendly and built to last. If I could have nothing but vintage rugs in my house, I’d be cool with that!

And where does one find these amazing rugs without spending a small fortune? It can be a challenge to find them because vintage and antique rugs (especially larger ones) can get pricey. Luckily I spend way too many hours on the internet and I know where to look! In general these are more affordable options from bigger stores that range in price from $90-$500. I should mention there are a ton of amazing small shops out there that carry a beautifully curated collection but usually have higher prices. There is a lot of work involved in sourcing, curating and even cleaning these babies and that isn’t cheap! I’ve got nothing but love and respect for what they do (and purchase from them when I can), but today I’m going to focus my efforts on more budget friendly versions.

Let’s dive in!

EsaleRugs

I usually go here first. They have incredible prices and the shipping is insanely fast!

Here are some of my favorites in the $300-$500 range:

Etsy

There are literally thousands to choose from, so I took a couple of hours and narrowed down some afforable options under $500. Lots of fun pastels in this batch!

Ebay

Lots of bargains to be found here. I’m very bad at bidding (I’m impatient) so I usually search for the Buy It Now options, but you could probably save a bunch by doing the bidding route. One of these is under $100!

living-room-vintage-runner.jpg

And remember, vintage rugs are one of a kind! Come back tomorrow for some great vintage-inspired rug options that are just as affordable and more readily available!

I hope you found this useful!

This post does contain some affiliate links meaning if you purchase something you've clicked on,  I will get a small commission. I only promote the products I truly love though!

5 Comments

A simple bathroom update for under $40

One of the most under appreciated parts of your bathroom is the linen closet. Its easily overlooked yet you use it everyday and it doesn’t just have to be a dumping ground for towels. After a big closet clean out I started brainstorming ideas of how to elevate those builder grade shelves and amp up the style without breaking the bank. I’ve always loved the fresh and timeless look of marble and I haven’t met a bathroom or kitchen that it didn’t shine in. Its just so beautiful, sophisticated and transcends so many styles! My grandmother used to treasure all of her furniture with marble tops that dated back to her first years of being married in the early 1940’s. Its just everything and I want it everywhere. Getting a marble slab and cutting it down into shelves wasn’t really in my budget or timeframe (I was looking for an easy Saturday project) so after a quick Google search, I came across marble contact paper and decided to give it a try!

bathroom-closet-before-1.jpg

If I’m being honest, I wasn’t sure if this was going to work out as the idea of using marble contact paper in place of actual marble seemed far fetched and a bit of a hack (I guess technically it is though). Skepticism aside, I’m always up for a quick and dirty project that is cost-effective and I can do myself and this perfectly encompassed that concept. Plus, the paper is really pretty good!

bathroom-closet-before-2.jpg

Before starting, make sure to fully clean and prep the surface. I did a big clean out and organized the heck outta my closet and threw a ton of crap away, which felt so great! Organization is an amazing thing for mental clarity!

marble-contact-paper.jpg

You will need just a few simple things to create this in your home:

• Scissors
• xacto knife
• measuring tape (for bigger areas)
• a credit card (this is optional and my fingers worked
• lots of patience

The patience part is key. Take your time and slowly pull back the wax paper backing as you stick the paper down. I just used my fingers to press down, but using a credit card to flatten as you go might be better. Make sure you knife is sharp for cutting corners and edges. I can’t emphasize enough to take your time. Going too fast will cause air bubbles to form and you want this to look as smooth and realistic as possible.

bathroom-closet-after-empty.jpg

There are definitely some mistakes in my application, but overall it looks great and you can’t really tell from afar! My shelves are definitely feeling more fresh and sophisticated. If you are wondering about the quality of the paper, I would say its great and it goes on pretty easily (if you take your time!). My only slight hesitation for not giving it 5 stars is I would have preferred a more matte/honed look and this paper is kinda shiny.

marble-shelf-close.jpg

This is a great and quick way to amp up your linen closet or pantry (I’m pretty sure I will be using it in there too) and can be completed in about 2-3 hours, depending how much real estate you have. So fun and easy!

I hope this inspired you to tackle and give some life to a forgotten space in your home! The possibilities for using this are endless!

Comment

12 awesome (& affordable) throws from Amazon

12-amazon-throws-pin.jpg

Well guys, I’m at it again with another shopping roundup! I’ve been spending all my waking hours lately on my computer (and some only half awake!) sourcing everything from rugs to chairs to art and accessories for different clients. Rarely, do I come across a client or friend that isn’t looking for beautiful design on a budget. Hell, I can 100% say the same for myself! So today, I thought I would share some awesome, budget-friendly throws I found on non other than Amazon!

You really can find so much (almost everything?) on Amazon and I truly have a love/hate relationship with the establishment. Its so convenient and quick and they have ALL THE THINGS! Including really cool throws! On the other hand, that convenience and every green availability causes me to bleed a lot of money. I am embarrassed to say how much I spend there every month! Regardless, I keep coming back!

Inevitably, when shopping for clients, I also shop for myself. So after finding the PERFECT throw with those chunky and gorgeous tassels, I had to grab it up for myself and my client. I love what a throw brings to the table in a room: texture, coziness and a casual lived-in feeling that really ties everything together. And you can never go wrong with tassels!

amazon-throw-roundup-image.jpg

Isn’t she gorgeous? And apparently, the same Amazon shop that sells that style sells lots of other really cool ones that are around $50. The blue tassel beauty was $79.99. Not the cheapest, but not bad!

With that said, sharing is caring so here are 12 really lovely throws all from Amazon that are affordable and available in 2 days with Prime! (sorry folks, I had to)

12-amazon-throws.jpg

1 / 2 / 3 / 4 / 5 / 6 / 7 / 8 / 9 / 10 / 11 / 12

Side note: Do you guys enjoy these roundups? I know i’m not the first or the last to create this type of content, but they are fun and I hope they bring some value! If you are into them, what other types of items are you guys interested in seeing from me? Let me know in the comments!

This post does contain some affiliate links meaning if you purchase something you've clicked on,  I will get a small commission. I only promote the products I truly love though!

1 Comment

Turning my bathroom into a cozy and relaxing retreat

scs-company-store-bath-8.jpg

Since it's officially fall, I thought I’d add some cozy layers and style to my master bathroom. Everyone wants a spa-like feel in their master bath, right? I had so much fun styling my bedroom with lovely linens from The Company Store, so when they asked if I would like to try my styling hand with some of their bathroom items, I happily accepted!

Let’s dive into some of the pieces I chose!

A bathroom isn’t typically thought of as one of the coziest spots in a home, but it should be! I mean you do get naked in there, right? Enter the softest and most cloud-like towels you have ever wrapped your body in!

Towels / Towel Rack / Butterfly Print

Towels / Towel Rack / Butterfly Print

I thought I had good towels before, but the Dot Supima® and Fleur Supima® Luxury Bath Towels blow them out of the water! They are so soft, plush and absorbent, plus I love the classic look of crisp white and the subtle playfulness of the patterns.

scs-company-store-bath-2.jpg

And speaking of cozy, that bathmat is the softest! I chose the Trellis Bath Rug in neutral and I love that fun graphic pop against the tile and how it breaks up some of the white in the room.

scs-company-store-bath-9.jpg
scs-company-store-bath-6.jpg

To bring more height to my bath tub area, I pulled in my bigger fiddle leaf and then made a little vase with some faux eucalyptus out of that cute little Carnival Stripe Lotion Pump on my bath caddy. I love a multi-purpose piece!

scs-company-store-bath-7.jpg

Their Regal Embroidered hand towels are so soft and add a touch of color and pattern on that rattan stool. The whole look makes me want to lounge in the bath with a glass of wine and a good book!

scs-company-store-bath-10.jpg
scs-company-store-bath-11.jpg
scs-company-store-bath-4.jpg
scs-company-store-bath-12.jpg

One of my favorite parts of styling is zeroing in on all the fun details! I’m drawn to modern/classic simplicity (like stripes!) and I love how the pieces from The Company Store® seamlessly blend with the rest of the decor. Instead of keeping the Carnival Stripes family of accessories together, I spread the love out over the entire bathroom so you can see everything tied together. Plus, stripes pretty much go with everything!

scs-company-store-bath-15.jpg
scs-company-store-bath-14.jpg

My bathroom closet also got some love! I added marble contact paper (a whole post on that coming soon), accessorized with simple glass containers, all of those glorious towels, and added additional storage: from the distressed canvas storage bin (which holds so much), to these awesome upholstered laundry hampers in different shades of blue, to the Handwoven Chindi Storage Bins up on top. I got some stripes in there with my favorite little canistersperfect for storing cotton pads and makeup sponges.

I love how fresh and clean this all feels with pops of blue, white, black, with a neutral background, not to mention all the softness and texture from the linens. There is nothing better than a clean and organized bathroom to set the mind and body at ease.

This post is sponsored by The Company Store. All thoughts and opinions are my own. Thank you for supporting content that keeps Sunny Circle Studio going!

2 Comments

12 amazing chairs under $300

12-accent-chairs-pin.jpg

I’ve had chairs on my brain lately and I’ve been doing lots and lots of shopping for different clients (and myself..who am I kidding)! Specifically, affordable accent chairs have been the order of the day so I thought I would round up some of the best options I have found that are $300 and under!

Disclaimer: I haven’t seen all of these in person (only a few) so I can’t speak to their quality and construction, but I do make a habit of reading the reviews and paying close attention to the materials while also focusing on the style.

Here are a couple of highlights from my list:

living-room-chair.jpg

The grey chair was purchased from Home Centric (a local store) but I sourced a very similar one from All Modern that has all that good tufting as well. Such a fun and sophisticated detail!

guest-8-low.jpg

And that Target chair is just so, so good! I have used it in multiple places in my home and suggested it for several clients. The quality, shape and design is very good especially for that price point. Also, the simple and modern shape goes with any style of decor. As of right now, that color (Millbrook Husk) is sold out, but I did find a similar (identical?) one from All Modern.

I rounded up 12 of my favorites below with all the sources linked at the bottom. Are you guys into these types of roundups? Lemme know in the comments if you find them useful and any other ideas you might have!

Happy looking/shopping and thanks for reading!

12-chairs-300-round-up.jpg

1 / 2 / 3 / 4 / 5 / 6 / 7 / 8 / 9 / 10 / 11 / 12

2 Comments

A bold & quirky guest room refresh (the plan)

guest-2-low.jpg

I’m at it again refreshing my guest room and while I love the neutral and simple vibe happening currently happening in this room, I’m always up for a change!

I recently had the chance to try out some of Chasing Paper’s new collection of removable wall paper with Graduate Hotels that is playfully inspired by the Gradate Hotels’ preppy aesthetic and signature interiors. I was immediately drawn to the vintage art print and thought it would be such a fun statement piece in a bedroom. And I sincerely love changing things up around my home (it’s my own personal canvas, after all).

guest-room-accent-wall-mockup.jpg

I created a mockup of the wall with some of the pieces I’m planning to add in addition to the wallpaper. Its a statement for sure, but I’m kinda digging it! I like getting out of my comfort zone and trying something a bit different. And their wall paper is such great quality and easily removed, so its not a huge commitment.

Lets also talk about the art on the ledge! I’m still honestly debating on whether that wall even needs art, but I’m going to try it since I have already this picture ledge installed. I’m keeping the vintage theme going (because its very fun and I’m obsessed) and adding vintage inspired paintings and a few simple & graphic prints to the ledge. I found some really lovely prints from Artfully Walls that are perfectly full of character and charm and evoke that 1950’s style. I can’t get enough of it!

I’m also still debating the nightstands. I really wanted a campaign style but I can’t seem to find any that I love that aren’t under $350. I feel like that is a lot for nightstands, especially because I need two and that math rounds out to about $700+. Ouch. Target to the rescue! I know that there are probably much better quality night stands out there, but I love the style and the shape (and the color!) of these and I’m ok with going in a more budget-friendly direction.

So that is about it for now! I’m planning on ordering everything and getting to work styling and designing very soon. Come back and see the full reveal with better photos in a few weeks.

If you guys are into it, here is the full wall mockup with the sources below.

Thanks for reading!

guest-room-accent-wall-plan.jpg
Comment

Easy pressed plant art DIY

Chair / Throw (similar) / Rug / Basket (similar) / Ottoman / Pillow / Curtains / Drapery Rod

Chair / Throw (similar) / Rug / Basket (similar) / Ottoman / Pillow / Curtains / Drapery Rod

Happy Friday, folks! I’m dipping my toes into the world of DIY today with a ridiculously easy (and cheap) tutorial using yard clippings as art! I’m really into the botanical art trend these days and I wanted to try my hand at making something inspired by it. I call this a tutorial, but its honestly just a few simple and very practical steps to creating nature-inspired art in your home.
Let’s dive in:

pressed-plant-diy-6-blog.jpg

First off, walk outside and find some cool yard clippings from a tree or shrub! I actually love doing this for adding greenery into my home as well. Its cheap (well, free actually) and brings beauty, character, texture, and good energy into every space. We all need a bit of that!

pressed-plant-diy-7-blog.jpg
pressed-plant-diy-5-blog.jpg

The things you will need in addition to your greenery: some heavy books, wax paper and double sided tape. Place your clippings inside of two pieces of wax paper (to protect and absorb moisture) and then press with the books. Ideally, you will want to leave the plants pressed inside (or under) the books for a couple of days to a week, depending on your chosen foliage. I got a little antsy and only did mine for couple of days.

pressed-plant-diy-4-blog.jpg

I used double-sided tape to secure my plant to the glass. In hindsight, I’m wondering if there was something I could have put on to preserve the green color, but I wanted to experiment and try this out so if it browns too much for my taste, I’ll re-think that for the future!

I found these inexpensive vintage-inspired brass floating frames from Michaels and they work nicely for the look I was going for. I could see other frame styles working as well if you wanted a more modern look.

pressed-plant-diy-3-blog.jpg

And that is it! Frame and enjoy! I told you it was easy. I might experiment with a bigger plant and frame in the future or maybe even..dare I say faux plants!

pressed-plant-diy-2-blog.jpg

What do you guys think? This was easy and could be done in about an hour once you press the plants. I made a little infographic tutorial in case you want to try it out this weekend!

diy-pressed-plant-pin-OPT-3.jpg
3 Comments

Creating a beautiful, well organized and damage free space with Command™ Brand Metallic Hooks

This post is sponsored by Command™ Brand. All thoughts and opinions are my own.
Thank you for supporting content that keeps Sunny Circle Studio going!

scs-command-1-blog-2.jpg

I don't know if you are like me, but when my home is organized so is my mind. A clean and tidy space gives me peace of mind and helps motivate me to complete projects, do yard work, spend more time with my family, read books and even bake cakes (kidding, but I do love to bake)! And when you combine beauty with functionality, you get the best of both worlds.

scs-command-4-blog.jpg

I recently got my hands on some of Command's newest product line of metallic hooks and let me tell you - they do not disappoint in either of those above-mentioned categories! I have been a fan of Command® Strips for a while and use them all over my house, mostly for picture hanging. Their new metallic line of hooks was exactly what I was looking for to decorate and organize my vanity area in my bedroom, without doing any damage to my walls! I am a notorious hammer of nails into walls. No kidding, I have SO many holes in my walls behind framed artwork and mirrors. It's pretty ridiculous! I guess you could probably call me lazy and eager to hang things! With these new hooks, I was able to quickly decorate the area and move things around without even creating one single hole!

scs-command-7-blog.jpg

The finishes of the hooks include stainless steel, brass, matte black and copper. Naturally, I was drawn to the brass and matte black because I cannot quit them! I love how easy setting up this little area was. I knew I wanted a spot to put some of my scarves, jewelry and I even threw in a quick DIY hanging frame of my kids. I literally got a piece of string and attached it to the frame, so I'm not technically sure it counts as a DIY, but I like the results!

I also created a fun little hat wall with the matte black hooks that took me about 5-10 minutes to install! Cute, simple, convenient and super customizable!

scs-command-3-blog.jpg
scs-command-6-blog.jpg
scs-command-8-blog.jpg

I had so much fun styling and getting creative with these products! I loved the sophisticated, modern finish of these hooks. Not to mention they look very luxe but are an affordable decorative touch you can add to any area in your home. If you are looking to quickly organize and beautify a space, I highly recommend them! They call it 'damage-free decorating' and I'm totally in on that!

2 Comments

The perfect personalized and inexpensive gift for any occasion

greetabl-scs-3-blog.jpg

I love the idea of sending a friend, loved one or even a colleague or client a little something to show love, kindness and/or gratitude. There is just something so incredibly special about receiving a lovely and unexpected piece of happy mail. Just a little something to say 'I love you', 'happy birthday' or 'thank you' makes all the difference. And as a designer, something that is completely personalized but also very beautiful and well-designed checks all of my boxes. 

When Greetabl reached out to me to see if I would be interested in creating my own personalized gift, I happily jumped at the chance to customize a special gift for my sister who just had her fourth child and also had a birthday coming up! Everyone needs a little love and attention in their life, especially a very busy and sleep-deprived momma!

greetabl-scs-1-blog.jpg
greetable-scs-2-blog.jpg

Greetabl is an online one-stop-shop for creatively-curated gifts and greetings that are personalized, packaged and sent in just a few clicks. I had a hard time choosing from all of their amazing designs and patterns, not to mention the fabulous selection of gifts to choose from. It was all soo good. I wish I would have known about this company years ago!

I chose a beautiful and colorful botanical print and paired it with some of their adorable birthday imagery. You can also customize the images to your heart's desire, adding personalized photos and graphics to the squares. 

Once you settle on a design, you then go on to choose the gift that will be included in your Greetabl. They had the best selection from amazing candles, beauty products and delicious candies to name just a few. I really had a hard time choosing! 

greetabl-scs-4-blog.jpg
greetabl-scs-5-blog.jpg

Sometimes a card isn't enough and $50 flowers are too much. The price for each Greetabl is around $30 and I love that you can send-the-love without breaking the bank. Such a simple little gesture that makes a really big impact! 

I highly recommend checking them out the next time you need to send a little something to a loved one. These would also be so great to send to a client or colleague! The possibilities are endless!

Use the code sunnycirclestudio to get 15% off your next purchase!

This post is sponsored by Greetabl. All thoughts and opinions are my own. Thank you for supporting content that keeps Sunny Circle Studio going!

Comment

9 amazing faux plants that could pass for the real thing

faux-plant-shelf-blog.jpg

Let it be known that I have a love affair with the faux plant. And the real plant too, but I have a tendency to neglect/forget and eventually kill the real ones. Its a total bummer, but thankfully there are lots of folks out there just like me and therefore the market responded and started making some amazing faux versions. Plant killers and lazy homeowners unite!

close-up-olive-branch.jpg

I have plants all over my home - both real and fake. I'd say the ratio is about 50/50 at this point. I honestly used to be embarrassed to admit that, but I've gotten over that now since I've decided to dedicate a blog post exclusively on the subject. Lol. To me, the most effective way to use the faux is to the blend with the real, so things feel balanced and believable. This is not necessarily my hard and fast rule, but just a good tip that works for me. 

Some of my favorite faux options for botanicals are the olive branch, cactus, fiddle leaf, tulip and any kind of trailing plant. Those are especially good on shelves and up high so even if they aren't amazing, you can't get close enough to tell. 

One of my go-to places to shop for faux greenery is World Market. Everybody has that incredible 6' fiddle leaf (for good reason) and their faux cactus selection is on-point. Pottery Barn, West Elm and Ikea are also great resources for artificial botanicals. I've also discovered some amazing faux tulips this year from places like Magnolia and Home Centric. Of course, fresh tulips would be ideal, but these fake ones look very convincing and THEY NEVER DIE!

I've rounded up some of my favorite faux options below (some of them I own!):

faux-plant-roundup.jpg

1. Olive Branch / 2. Trailing Succulent / 3. Blue Myrtle Cactus / 4. 6' Fiddle / 5. Tulips / 6. Spider Houseplant / 7. Large Succulent / 8. Senita Cactus / 9. Potted Fern

So what do you guys think about faux botanicals in general? For them? Against them? Mixed feelings? Let me know!

This post does contain some affiliate links meaning if you purchase something you've clicked on,  I will get a small commission. I only promote the products I truly love though!


2 Comments

Refreshing my bedroom with layers of colorful linen

company-store-2-blog.jpg

To be quite honest, my bedroom has always been a challenge for me to style. It used to be painted a blue-ish grey (which in looking back I actually really liked) and I painted it a crisp and clean white earlier this year. I looove the way white interiors look in other's spaces and I wanted to try it out myself, but I have struggled! The room checks all the boxes: lots of natural light, big and open with lots of windows, but so far all the things I have tried have left the room feeling a bit flat and soulless. 

I think the obvious solution staring me in my face was color! When The Company Store reached out for a potential styling opportunity with all their gorgeous bedding, I knew it was a perfect opportunity to add some much-needed color back into the room. 

company-store-1-blog.jpg

I chose to dress the bed entirely in their Comfort Wash Linen (in Mineral Blue and Creamsicle) as its one of my favorite materials. I love the subtle texture and how light and airy it is. We run hot when we sleep, so linen is a literal dream for us! Another bonus to linen is how casual yet up-scale it feels and it gets softer after every wash.

company-store-3-blog.jpg
company-store-4-blog.jpg

How good is that pillow combination?! The bold pop from the blue stripes mixed with texture and tassels in the geometric cream pillows. One can never have enough throw pillows in their collection! 

company-store-6-blog.jpg

I had to add a bit of plaid to the mix and I love the combination of the cozy wool from the throw (that is washable!) with the cool linen. 

company-store-7-blog.jpg
company-store-5-blog.jpg

I'm loving the pastel vibe that is happening in here now and how things are feeling a bit more interesting and full of life. Color will do that! 

I think I'll always return to blue when in doubt!

This post is sponsored by The Company Store. All thoughts and opinions are my own. Thank you for supporting content that keeps Sunny Circle Studio going!


Comment

5 Ways to Add Style & Charm to a 90's Home

living-room-fireplace.jpg

Do you ever look up your home on Zillow or Realtor.com? Every couple of months, I like to check in on current home's value (aka it's 'zestimate') and see the market trends. A fun fact about our particular home when googled is all the old photos of past iterations are still available to see! Here is a glimpse of our living room, circa 1995 (I think):

ISejqh091rcecj.jpg

A little bit of history on our home situation: she was built in 1989. Not exactly a banner year for home design (in my humble opinion). When we moved to Raleigh, I really wanted an older home with lots of character - think a 1930's Tudor or a Mid-Century Craftsman, but what we ended up with was a spacious and well-built late 80's home with a double porch on a cul-de-sac. We saw lots of potential not to mention this house checked off many of our must-haves. I was determined to interject some charm and character, paying tribute to those older styles I loved so much. The rules of the universe do specify staying true to a home's history but in our case, I have zero interest in embracing floor length ruffle-skirts or 80's brass!

So here are some practical tips for adding some style and charm to a late 80's/early 90's style home (with before and afters thrown in there for good measure): 

1. Neutralize with Paint

ISejqh053p4aeb.jpg
bright-happy-dining.jpg
sunny-living-room-blog.jpg

I know this is very obvious. But the right paint colors can modernize and lighten an otherwise outdated space. Our dining room used to be painted red. At the time, this was considered fashionable but it feels so heavy for today's standards. Choosing a light and bright neutral and continuing that color across multiple rooms or floors will keep things feeling cohesive and intentional, not to mention neutrals will stand the test of time.

2. Play with Different Styles

IS1jiyjibxenpgj.jpg
modern-office.jpg

This is a big one for me. I happen to love many styles ranging from Scandinavian, Traditional, Modern, Coastal, Farmhouse and Mid-Century, but it's very important for my home to feel happy and full of character, no matter what style. Mixing styles is a great way to keep things feeling very collected and casual without committing to one style and making your 80's/90's home feel cookie cutter and personality-less. Home decor is fun and I don't like to take myself or my style too seriously. One thing to note is when mixing, make sure your color palette is somewhat consistent, which leads me to my next tip.

3. Keep your Color Palette Consistent

l4d528144-m7xd-w1020_h770_q80.jpg
window-seat-colors.jpg

As long as you keep things fairly consistent on the color wheel, you can go to town in the style department. My rule of thumb is to start with 1 or 2 colors that you respond to and love, add highlights and lowlights of those colors to the mix (this basically means a darker and lighter tone of one of your main colors), add in some neutrals and don't forget about texture! An interior color palette that is cohesive and flexible will create and stylish and more importantly - timeless look.

4. Keep Things Simple & Classic

ISejqgfn64zrmr.jpg
bathroom-tub-view.jpg

I will use my master bathroom as an example for this one. We renovated that bad boy last year and it was something I had been looking forward to for years! With all the buildup and excitement, I really wanted the space to be a showstopper. However, keeping things classic and as timeless as possible was equally as important. I chose materials like marble, white subway tile and hex tile in black & brass finishes as well as adding warmth with walnut accents. I want to love my choices and design decisions for years to come and choosing classic styles will achieve that effect. 

5. Lighting is Everything

ISejqh015mw6g3.jpg
breakfast-nook.jpg

Another very obvious thing, but seeing is believing! I have added new lighting of all different styles to every corner of my home and it has immediately made an big impact. 

In the end, its really about what makes you happy in your own home! If you love it, go for it! Any additional thoughts on this subject? Tips? Tricks? Let me know in the comments!

27 Comments

A Big Ol' Removable Wallpaper Roundup

wall-paper-entry-blog.jpg

Over the last year or so, I have found myself dabbling in the world of wallpaper, specifically the removable kind. And nowadays, so many amazing brands are making beautiful, high-quality removable wallpaper and decals! Its like candy for the style addict!

Let's take a look at a few wallpapered areas of my home and see what all the fuss is about!

That retro sunburst print in the entryway perfectly blended with the gray walls and gave just enough pattern and color to make the little space feel happy and finished. It was fairly easy to install but a bit tedious and time-consuming lining up each panel. My advice would be to order extra and take your time! It's incredibly easy to remove and reposition though, making it the perfect item for the fickle stylist and home decor enthusiast (me). It's from Chasing Paper and one of many amazing designs they offer. 

cloud-mural-wallpaper.jpg

There are so many fun styles out there but in my experience, I have found that sticking to designs that aren't too bold and in your face fits my aesthetic a bit more. You still get the impact, but a softer and quieter version that blends without demanding all the attention. 

That Anewall cloud mural was the perfect solution for an accent wall in my daughter's big girl room. Its so light and dreamy and really makes the room without demanding all the attention, which sounds a bit like a contradiction but it works! Technically it's a traditional paper, but they make a removable version in that design. 

decal-wallpaper.jpg

I always get so many questions on the 'dot wall' in our bonus room and folks are always surprised (and delighted) to find out those dots are actually decals. It was ridiculously easy to install (and I use that word very lightly) but I made the mistake of not ordering enough (twice)! All in all, I would use those decals again in a heart beat though! You can remove them in a flash and - boy oh boy talk about a graphic impact! I guess I do like a bold choice in the right place!

chalkboard-wallpaper.jpg

I'm obsessed with that chalkboard wallpaper from Rachel's home tour. What a fun and creative way to use removable wallpaper with kids in mind. I love that it functions as part decor and part canvas for her kids to create to their hearts desire. 

Some of my favorite places to shop for removable wallpaper are Chasing Paper, Anthropologie, Anewall, Hygee & West, Wayfair and Urban Walls. I spent some time scouring the internet in search of all my favorite removable wallpaper options and rounded them up here:

removable-wallpaper-roundup.jpg

1. Meadowfield Wallpaper | 2. Watercolor Check Wallpaper | 3. Hatch Wallpaper | 4. Logan Wallpaper | 5. Sonora Wallpaper | 6. Lemons Removable Wallpaper | 7. Constellation Map Wallpaper | 8. Atmosphere Peel and Stick Wallpaper | 9. Inked Lines Wallpaper | 10. Aja Wallpaper | 11. Otomi Wallpaper | 12. Irregular Dots Decals | 13. Tangerines in Greens Decals | 14. St. Tropez Wallpaper in Sea Glass Wallpaper | 15. Capri Low Tide Wall Mural | 16. Nuage Mural | 17. Geometric Flower Wallpaper | 18. Shaping Up Wallpaper | 19. Sunburst Wallpaper | 20. Geo Wallpaper | 21. Vintage Art Wallpaper | 22. Floral Cut Out | 23. Prism Silver Wallpaper | 24. Thin Air Wallpaper

This post does contain some affiliate links meaning if you purchase something you've clicked on,  I will get a small commission. I only promote the products I truly love though!

1 Comment